Dear Reader, in this age of AI created content, please support with your goodwill someone who works harder to provide the human-made. Sign up at the top of the lefthand column or bottom of this page. You will receive my hand illustrated monthly newsletter RESTORE NATURE and access to the biodiversity garden design course as I write...and nothing else, I respect your time. I am also removing the advertizing as best I can as its become intrusive inappropriate and pays me nothing.
Growing nopales in a dry summer climate
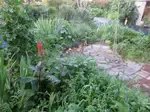
 a nopal cactus or prickly pear in Plattekloof
Nopales or prickly pear come from central America originally and are a strong element in the local cuisine. Here they were separated from the culture in which they are rooted as an agro-forestry plant. They were planted as cattle fodder in many areas of South Africa where they have become invasive. South Africans generally know the fruit are good. What fewer people know is that you can eat the pads too, and they are a common vegetable in Mexico and southern California. They have a green flavor like beans with lemon juice, and the mucilaginous texture of okra.
I will explain here how to grow nopales, as it is one of the plants possible in a garden of perennial
vegetables. Perennial vegetables are advantageous both for human and environmental health.
As said, some varieties of the plants are invasive in South Africa and we need to make sure they don't spread out of the garden. This can partly be prevented by removing fruit and not leaving ripe fruit on the plant for birds to eat.
Prickly pear or Nopales' Latin name is Opuntia. I had heard that the pointy type pads are less tasty and looked around for a round bladed kind. In the process I've seen at least four different Opuntia varieties growing in Cape Town. I fully attend to collect them anyway and taste them all. One can't be limited by what comes up on google.
How to grow nopales from pad cuttings
 some nopale cuttings, or pads slowly rooting on my window sill
First I broke off four pads from a cactus growing in an urban greenbelt. I then left them standing in a cardboard box indoors in a shady room, with the wound upwards, for it to dry and callous. After two weeks I planted them in medium sized pots, only burying them about 2-3 inches in the soil. I watered them about once a week. At first they were on my windowsill, then in the shade outside. After a long long time, nearly all winter, I tugged at them and 3 had rooted. There were no other signs of life. I decided to move them into a spot with a few hours of afternoon sun, and directed them with their blades east west, to minimize burning. When I read up about planting them I found orienting the blades like this while rooting the pads is common nursery practice, it just seemed appropriate.
 a spiky flower like nopal bud a spiky flower like nopal bud |
 coming up along the edge of the pad coming up along the edge of the pad |
After another month or so, as summer
approached in its fullness, I noticed a tiny very prickly bud on the
top edge of one of the pads. Within a week or so more buds appeared
and the first one enlarged. I was not sure at first if they were
flowers or pads coming. Within weeks these spiky buds had turned
into small pads, and continued to grow.
 at about one inch it is clearly a small pad
Planting out the nopales and allowing them to get established
When the pads got large enough that they made the pot plants a little unstable and top heavy I decided they probably needed to be firmly rooted in the ground and have access to more nutrients and soil than available in the pot. I planted out the two largest plants in partial shade. This is because although they may like full sun in colder zones, our sun in the summer drought is extremely hot and drying. We are in the top five countries on the globe for sunshine. Any soil with good drainage will do.
The most new blades on one plant were three. I could eat three young nopales in one meal and we want to get enough for eating at least once a month. Waiting for the plants to grow is obviously needed. I will not harvest now but leave them till they have about 36 pads between the four plants. I think it may take a year or two if each blade grows 3 other blades.
 the nubby hand sized pad the nubby hand sized pad |
 larger smoother leaves larger smoother leaves |
This is common with perennial vegetables. One needs to allow them to grow a little bigger and flourish before harvesting, whereas annual crops can be ready in weeks. The advantage of the perennials is that I'll not need to plant again, and in three years I will start to harvest regularly without any inputs. The perennials will need less water, resist drought and preserve the rich biota of the soil in their undisturbed glory, and I find most of them a lot easier to grow. Its nice to work with perennials also because you can plan and design the garden like a perennial garden.
 nopales freshly planted out in half shade
------
home page for hundreds of links on natural gardening
------
perennial vegetables, triple benefits and beauty
------
How to harvest, prepare and cook nopales
Restore Nature Newsletter
I've been writing for four years now and I would love to hear from you
Please let me know if you have any questions, comments or stories to share on gardening, permaculture, regenerative agriculture, food forests, natural gardening, do nothing gardening, observations about pests and diseases, foraging, dealing with and using weeds constructively, composting and going offgrid.

SEARCH

Order the Kindle E-book for the SPECIAL PRICE of only
Prices valid till 30.09.2023
Recent Articles
-
garden for life is a blog about saving the earth one garden at a time
Apr 18, 25 01:18 PM
 The garden for life blog has short articles on gardening for biodiversity with native plants and regenerating soil for climate amelioration and nutritious food
 -
Cape Flats Sand Fynbos, Cape Town's most endangered native vegetation!
Apr 18, 25 10:36 AM
 Cape Flats Sand Fynbos, a vegetation type found in the super diverse Cape Fynbos region is threatened by Cape Town's urban development and invasive alien plants
 -
Geography Research Task
Jan 31, 25 11:37 PM
To whom it may concern My name is Tanyaradzwa Madziwa and I am a matric student at Springfield Convent School. As part of our geography syllabus for this
"How to start a profitable worm business on a shoestring budget
Order a printed copy from "Amazon" at the SPECIAL PRICE of only
or a digital version from the "Kindle" store at the SPECIAL PRICE of only
Prices valid till 30.09.2023

")