Dear Reader, in this age of AI created content, please support with your goodwill someone who works harder to provide the human-made. Sign up at the top of the lefthand column or bottom of this page. You will receive my hand illustrated monthly newsletter RESTORE NATURE and access to the biodiversity garden design course as I write...and nothing else, I respect your time. I am also removing the advertizing as best I can as its become intrusive inappropriate and pays me nothing.
How to plant
a tube system
to save space and increase productivity in a small vegetable garden
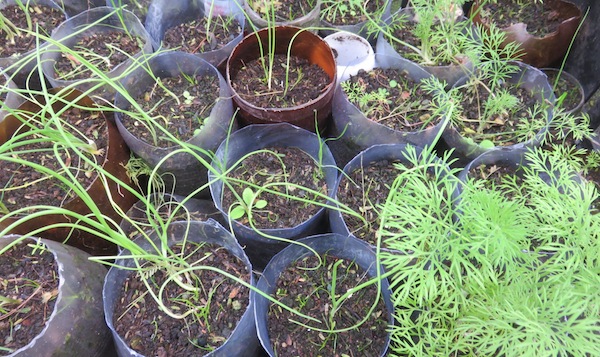 vegetable gardening basics on space saving
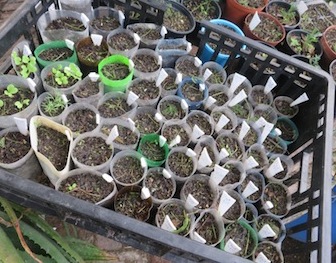
Optimizing space and productivity by propagating in 'tubes'
The mechanics of how to plant a tube system are straightforward. This article is on my first attempt at using one. It worked from the start, straight off the bat, and since then I’ve tried three other versions of the system. These were basically just tweaking it for different purposes. It really saves space in the garden in multiple ways.
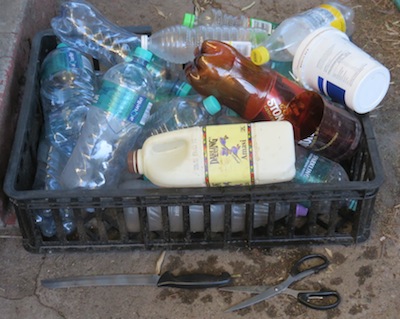 what does old plastic have to do with vegetable gardening ?
My inspiration for how to plant a tube system
I was first inspired by a book which is basically on how to up your productivity in a permaculture garden by Linda Woodrow. 1996. The permaculture Home Garden from Penguin Books Australia with a forward by Bill Mollison. She accomplishes her goals by using organic companion aligned dense planting patterns, chicken tractors and tube propagation in the most productive way possible. My garden layout and size cuts out the chicken tractors, but the tube system has proved to be an absolute watershed in my gardening practice.
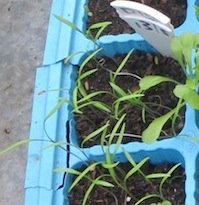 when deciding how to plant a tube system decide on seeds or seedlings
First thing, seed or seedlings ?
Before you start with the process and find out how to plant a tube system, you will need to decide on either using seeds or seedlings and if you need seedlings, you will need to raise plants. I sowed lettuce, onions and dill in six packs some weeks before building the system.
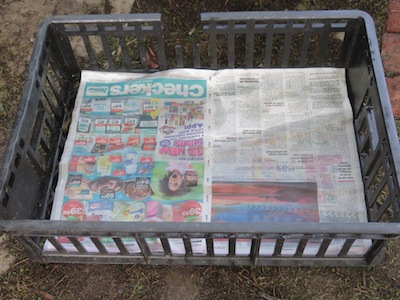 strong bread trays hold the tubes for seed propagation
How to plant a a tube system: containing the tubes
The next part of how to plant a tube system is to collect material to make tubes. It has to be recycled, for both economy and ethics. The tubes would fall over if left to stand alone so they need to be packed side by side in a tray. I used some available bread crates, and later on I used polystyrene fish boxes which can be got free. The easiest boxes to get are cardboard boxes. The disadvantage is that with all the watering their bottoms get soft and they can’t be carried around. To move the plants in a cardboard box you need a new dry box, and to transfer the plant tubes into it one by one before carrying them away. The boxes can get really heavy, and even dry cardboard boxes tend to cave in while you carry them and squash the plants around. I much prefer the strong bread crates, as seen above, if I can get them.
How to plant a tube system: the tubes
Linda Woodrow collects 1 litre plastic milk bottles and cuts them to make tubes. Perhaps these are cheap in Australia. I can’t afford to buy milk that way, as its expensive here, and milk in bags is cheaper and the bags are very useful. In the end I collected other bottles, like 2 Litre water bottles, Amasi (sour milk) bottles, and soda drink bottles. I took out a carrier bag whenever we walked the dog and found plenty of plastic bottles lying in gutters along the road.
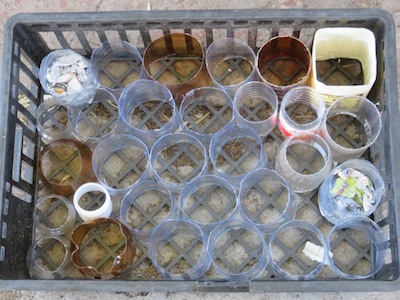 how to grow all garden seeds in tubes cut from bottles
The next step in how to plant a tube system is to make the tubes. I cut the tops and bottoms off the bottles with a self sharpening bread knife and a pair of scissors, to leave the tube with the greatest length possible. The tubes must have straight sides. The straighter the sides, the easier they are to remove when the plant has grown, and the less trauma the plant endures.
Linda Woodrow uses tubes for this reason, to lessen transplant trauma and to be able plant out vegetables when they are quite large already, so that her garden is at peak production. She only grows plants in the ground for a fraction of their life. After a few months the harvest occurs and then chickens come in and clean up before the next planting.
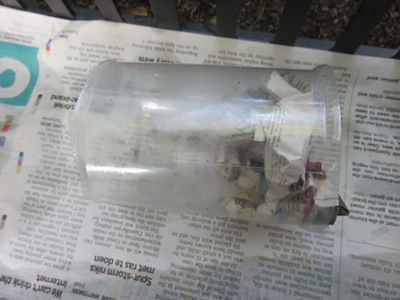 the newspaper ball keeps the soil in the tube, and vegetable roots grow through the newspaper ball
How to plant a tube system: assembling the tray and tubes
The next step in how to plant a tube system is filling the bottoms of the tubes and arranging them in the trays. I stuff the bottom of the tube with crumpled newspaper and tamp it down with my trowel handle. With cardboard tubes we use the cardboard cups torn off egg boxes as bottoms. I have got quite quick at doing this, but expect the assembly to to take time. It will pay off in the end.
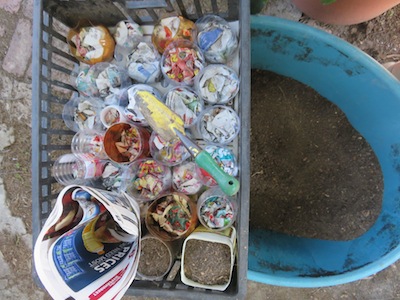 fill the tube system with sifted 50 /50 sand/compost
How to plant a tube system:
filling the tubes
The next stage in planting up this tube system is to fill the tubes with potting mix for growing seedlings. I mixed 50/50 sand and compost. I then sifted it to remove large bits of compost, and filled the tubes through a funnel made of rolled newspaper. The cardboard tubes I filled by pouring potting mix over the whole box, sweeping it in until they were filled level, and then moving them one by one into another box container, leaving the sand in the between spaces behind.
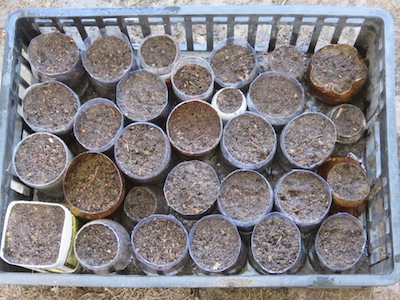 fill the tubes and sow with seed or plant up with seedlings
The conclusion of the first stage in how to plant a tube system
After the tubes are full of earth, water them with a fine spray (see my cheap recycled watering rose) and either sow seeds in them or plant seedlings, depending on how much space you have. In my home garden space is at a premium, so I sowed seed in six packs first. Linda Woodrow claims that seedlings can easily be transplanted when they are very young, barely two leaves plus a seed leaf, and that later transplanting is more traumatizing.
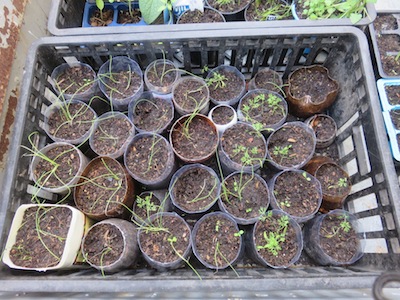 seedlings freshly planted in the tube system
I found that in our winter, or perhaps it was the transplant shock, these tiny seedlings in the tubes just became static and did not grow for months. This is why I began to tweak the system. I’ve tried smaller tubes, though the smaller bottles are hard to find, as well as toilet rolls, in which I sow direct, avoiding transplanting shock altogether.
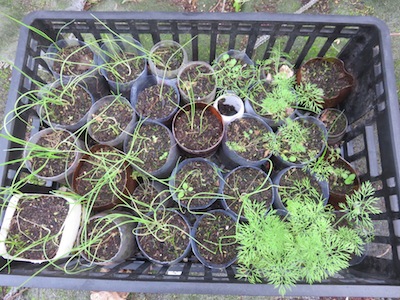 the seedlings two months later
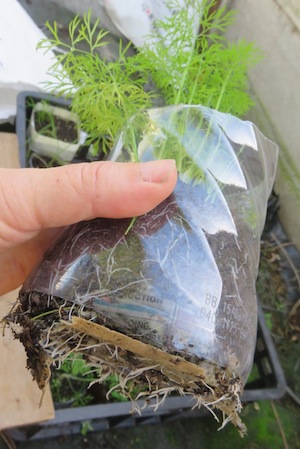 plant out robust well developed plants in the garden
Finally: your tube grown plants go to the garden
When the plants are quite large and robust, plant them out in their final location. By this time they will have well developed root systems. Dig a hole exactly the size of the tube, plant the tube and then gently pull it up till it is like a collar around the plant to protect the new transplant from pests. When it is obviously thriving, remove the tube completely. In the case of cardboard toilet rolls, they rot, and you do not have to remove them. Actually the hair roots may be embedded in the cardboard and shifting it up will probably do more harm than good.
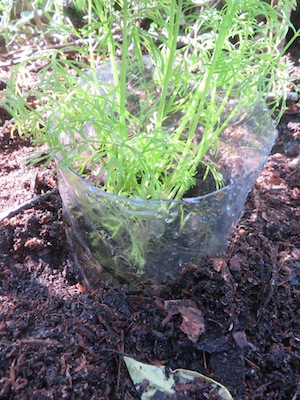 plant the tube in the ground and gently lift to form a collar
Why plant a tube system ?
… there are many advantages !
Optimizing productivity in the beds
You will see that your vegetable plants literally ‘hit the ground running’ and thrive. You save space in many ways. Seeds planted direct take time to germinate, and then time to grow, all the while exposed to the danger of scratching birds and pests which like fresh young seed sprouts. Months later you may have a sizable plant and then you must wait a while longer to harvest. However, with tubes your bed space is productive all the time, carrying plants close to harvest which just need to get a bit larger, rather than grow up all the way from seed. Your beds also only contain flourishing plants, as the ones that are weak and die off are left behind when you plant out from the tube tray. All in all from sowing to a 30 cm high dill plant I can cautiously pick from was 3 months, or 11 weeks. That isn’t enormously fast, but I am working on refining the method by sowing direct into the tubes.
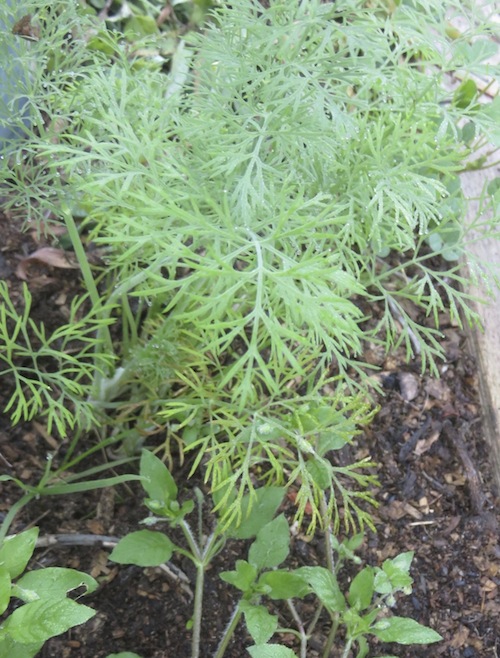 two weeks after planting remove collar and let plants thrive
Optimizing your nursery space
If you use small tubes, you can sow more seeds and also save space in the nursery. The tubes are packed tight together, and its easy to transport a lot of them at one time in their trays, which saves an enormous amount of time.
Tube systems suit organic propagation more than plug trays
The other advantage of this system, against plug trays for instance, is that there is enough soil for a seedling to grow without artificial feeding. In a plug tray the root space is so small, I’ve never got big plants using organic methods. Other people can perhaps. It is all a learning curve, and I’m in the enthusiastic beginner part of the curve, and I think what makes my life easier helps a lot of people who are there with me.
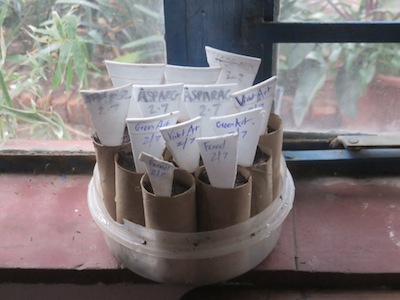 a mini windowsill tube system for seed propagation
The tube system uses
recycled materials
This method in which I describe how to plant a tube system can use
recycled materials which is a big plus. You can also re-use your plastic tubes again and again, though they do require time investment in the beginning. I hope you will find this article
useful and that it will help you with your gardening. I would be thrilled if you let me know of any
successes and problems if you try it. I will be making an album with pictures of the four variations of the tube system I've used thus far. Access it through the link below.
------
home page for more links to how to articles on natural gardening in the home garden
------
vegetable gardening hacks, such as easy bed preparation, easy veggies and water saving
------
album of pictures of tube system construction and use
Restore Nature Newsletter
I've been writing for four years now and I would love to hear from you
Please let me know if you have any questions, comments or stories to share on gardening, permaculture, regenerative agriculture, food forests, natural gardening, do nothing gardening, observations about pests and diseases, foraging, dealing with and using weeds constructively, composting and going offgrid.
You’re a home gardener ! Share your experiences and questions !
We all know about home gardening. Tell us about your successes, challenges and ask about issues that bother you. You may have the luxury of a back garden, but there are other ways we learn. Few people age without growing something or buying vegetables during their lives ! It is absolutely guaranteed that you have learned things which can help others on their gardening journey.
We invite you to share your stories, ask questions, because if a thing has bothered you it will bother others too. Someone may have a solution ! No question is too small. There is learning for everyone involved, for you, for me (yes, I learn from every question), for us all. Exciting stuff !
We are starting on a new journey. Every week we will profile your letters ! The best stories and questions we receive.
What Other Visitors Have Said
Click below to see contributions from other visitors to this page...
Another way to recycle plastic in the nursery 


I don't know what to do with these milk bags. Other ways of buying milk I can't afford. But they make PERFECT planting bags.
triple benefit for the environment is beach bottles 


A ready source of plastic bottles for the tube system of planting, or vegetable seed sowing, is the beach. Here we pick up the bottles washed up with the …
SEARCH
Order the Kindle E-book for the SPECIAL PRICE of only
Prices valid till 30.09.2023
Recent Articles
-
garden for life is a blog about saving the earth one garden at a time
Apr 18, 25 01:18 PM
The garden for life blog has short articles on gardening for biodiversity with native plants and regenerating soil for climate amelioration and nutritious food -
Cape Flats Sand Fynbos, Cape Town's most endangered native vegetation!
Apr 18, 25 10:36 AM
Cape Flats Sand Fynbos, a vegetation type found in the super diverse Cape Fynbos region is threatened by Cape Town's urban development and invasive alien plants -
Geography Research Task
Jan 31, 25 11:37 PM
To whom it may concern My name is Tanyaradzwa Madziwa and I am a matric student at Springfield Convent School. As part of our geography syllabus for this
"How to start a profitable worm business on a shoestring budget
Order a printed copy from "Amazon" at the SPECIAL PRICE of only
or a digital version from the "Kindle" store at the SPECIAL PRICE of only
Prices valid till 30.09.2023
