3 ways to help the author that COST YOU ABSOLUTE ZERO ! see the bottom of the page.
GARDEN PLAN
THE PREPARATION FOR PLANTING
backyard garden design project
stage 2
The lucky garden design route
enough money to do what you want
I didn’t do this route in my garden plan, firstly because I have to make do with
what I have and secondly because in such a small garden a quirky cottage garden
mix is lucky too, as its more about intimacy than elegance
Think about what plants would be right for your garden’s conditions, what design purpose they will fulfill in terms of colour, form, height and seasonal peaks, and which of these you like. Think how green you want to be and of issues like saving water, not having to use an irrigation system or a lot of pesticides and fertilizers and so forth. Study books on your local vegetation and observe it and photograph it, visit a botanical garden and observe what plants are growing in similar conditions of light etc. and how they go together, and which plants complement each other. Look up plants and their requirements in gardening books, ask gardeners, and nurserywomen and nurserymen for advice on where they grow and how much care they need.
Lay a fresh leaf of tracing paper over the plan of your garden’s established pre-existing features that you have measured up
see previous posting on how to measure up and other aspects of green gardening to consider
Combine planning your plantings and hard landscaping so that they work together to complement each other.
Plan to execute the hard landscaping first, taking your future planting into account (drainage, building, paving, paths etc.) (see section on using recycled materials link below)
Draw a more detailed garden plan. Design the layout of your planned plantings, sketching in the areas in where you want particular plants or assortments of plants, and imagining every detail you can.
Work out how many plants you need based on surface area, and normal growth habit of the plants
Source the plants from a nursery
Prepare your beds and plant up
my garden route
a garden plan designed for zero cost
2014-2016
For a couple of years I pinched and acquired cuttings in the neighbourhood.They were a mixed bag, based on what I could get, not on what would be the best in this garden, nor even on my favorite plants, but at least they grow well in my area.
I raised the plants, and tried to add more of those that suit the conditions in our garden, which is more shady than other local gardens.
late 2015
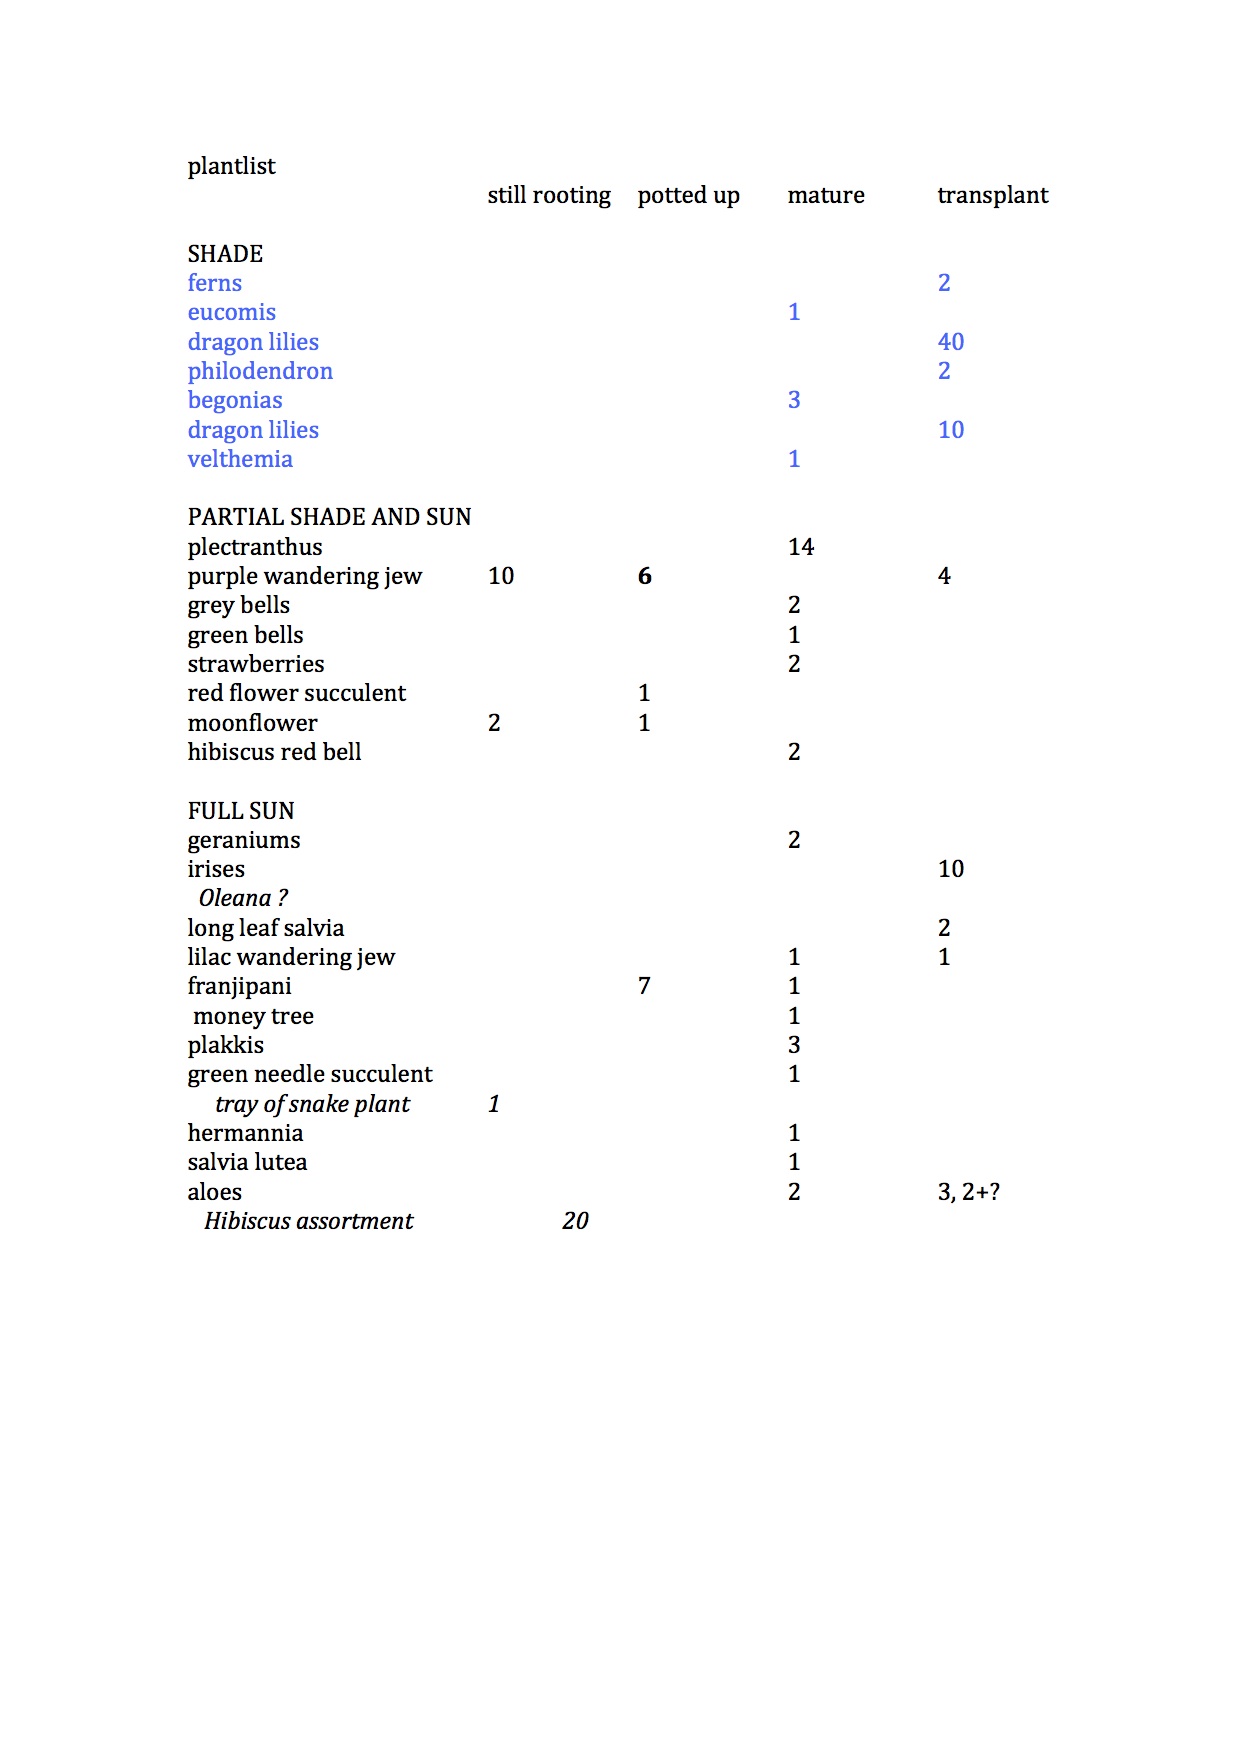
I made a plant list of what I have in the nursery
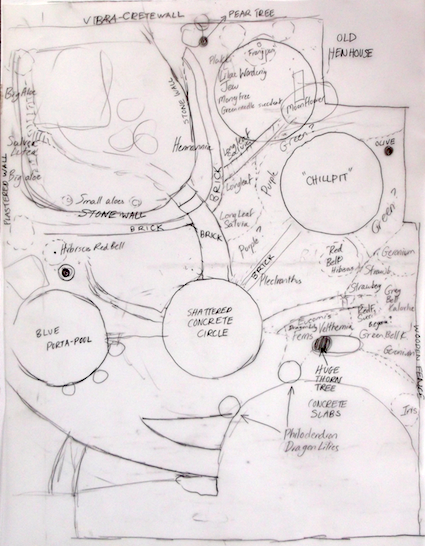
I made a rough garden plan, showing how to use the plants from my home nursery in terms of general areas where I’ll plant them
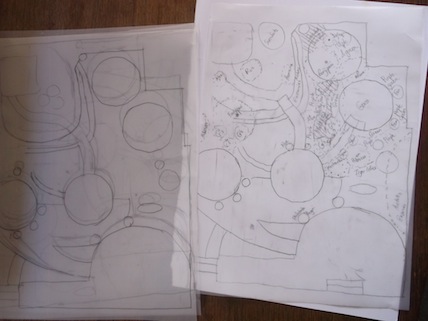
preliminary sketch
January 2016
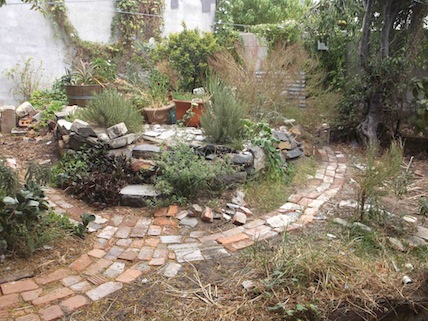
We laid a recycled cement circle in the center of the garden where a porta-pool used to be, and brick paths radiating from the circle to give access to all the beds on the south of the garden. I planted up part of the south side that was still open with strawberries, plectranthus and succulents.
using recycled building materials in landscaping
9 February 2016
I bought a few plants that I think will do well, and that I cannot access locally, because Granny’s Green Nursery is a wholesale nursery catering to landscapers and is very cheap. I bought single plants, and two six-packs, hoping that they will flourish and multiply
13 February 2016
I updated the plant list. I divided the list of plants I have according to their growing conditions which for this garden would be the categories shade, partial or intermittent shade and full sun. I make these lists on a computer so transforming them is easy, so much detail is not necessary unless you enjoy it.
In the next stage of garden planning I returned to the measured out plan of the garden as a reference. I listed each area of the garden that needed planting. Then I thought about the particular conditions of light in each, and subdivided them if there is variation within the garden area. The observation of the light can take many years and observation of how plants flourish in certain spaces. In a small garden, conditions will be affected by surrounding structures and change radically from winter to summer. Check out your house on a street map to see its north-south orientation. This will give you an idea of the most common direction of the sun at midday and which buildings will shade the garden in winter.
In the next stage of the garden plan, I listed the plants I could put in each area, taking their needs into consideration.
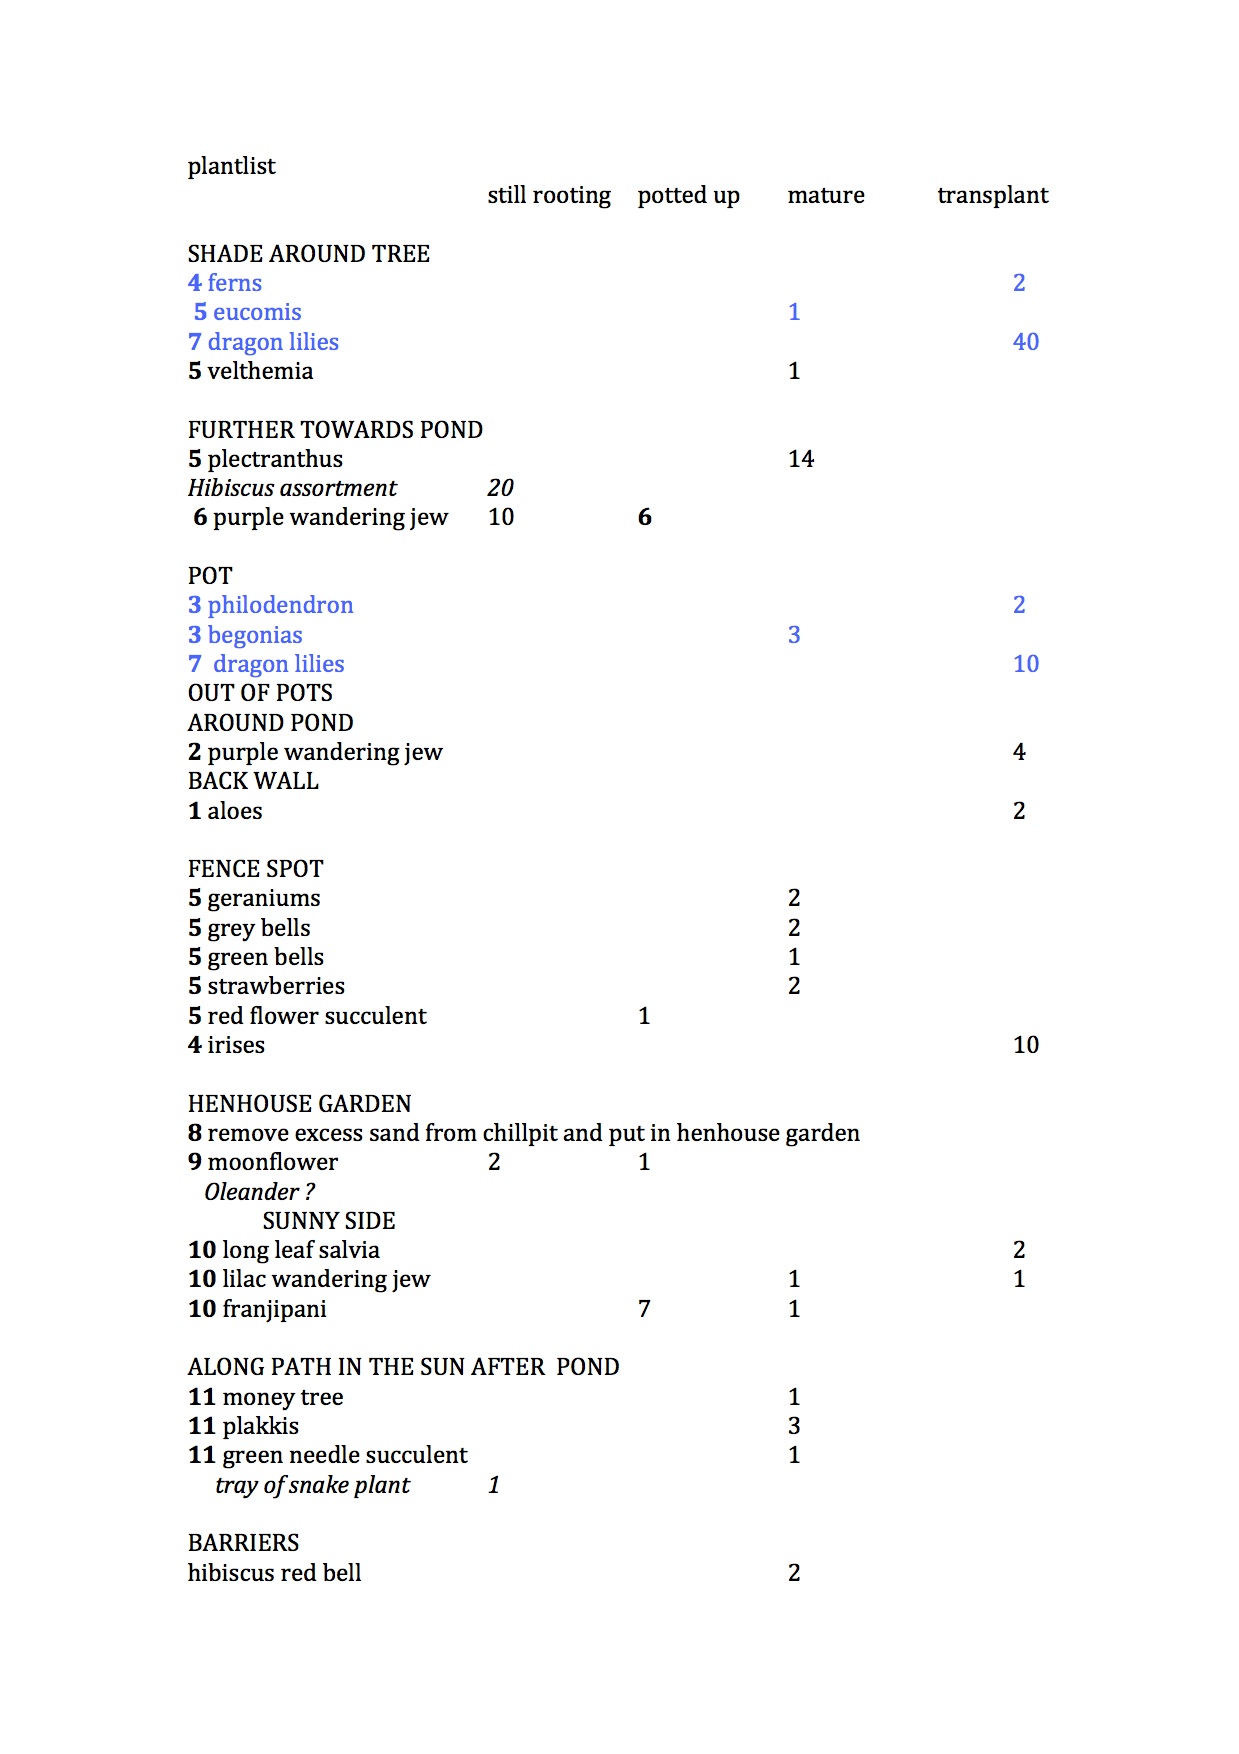
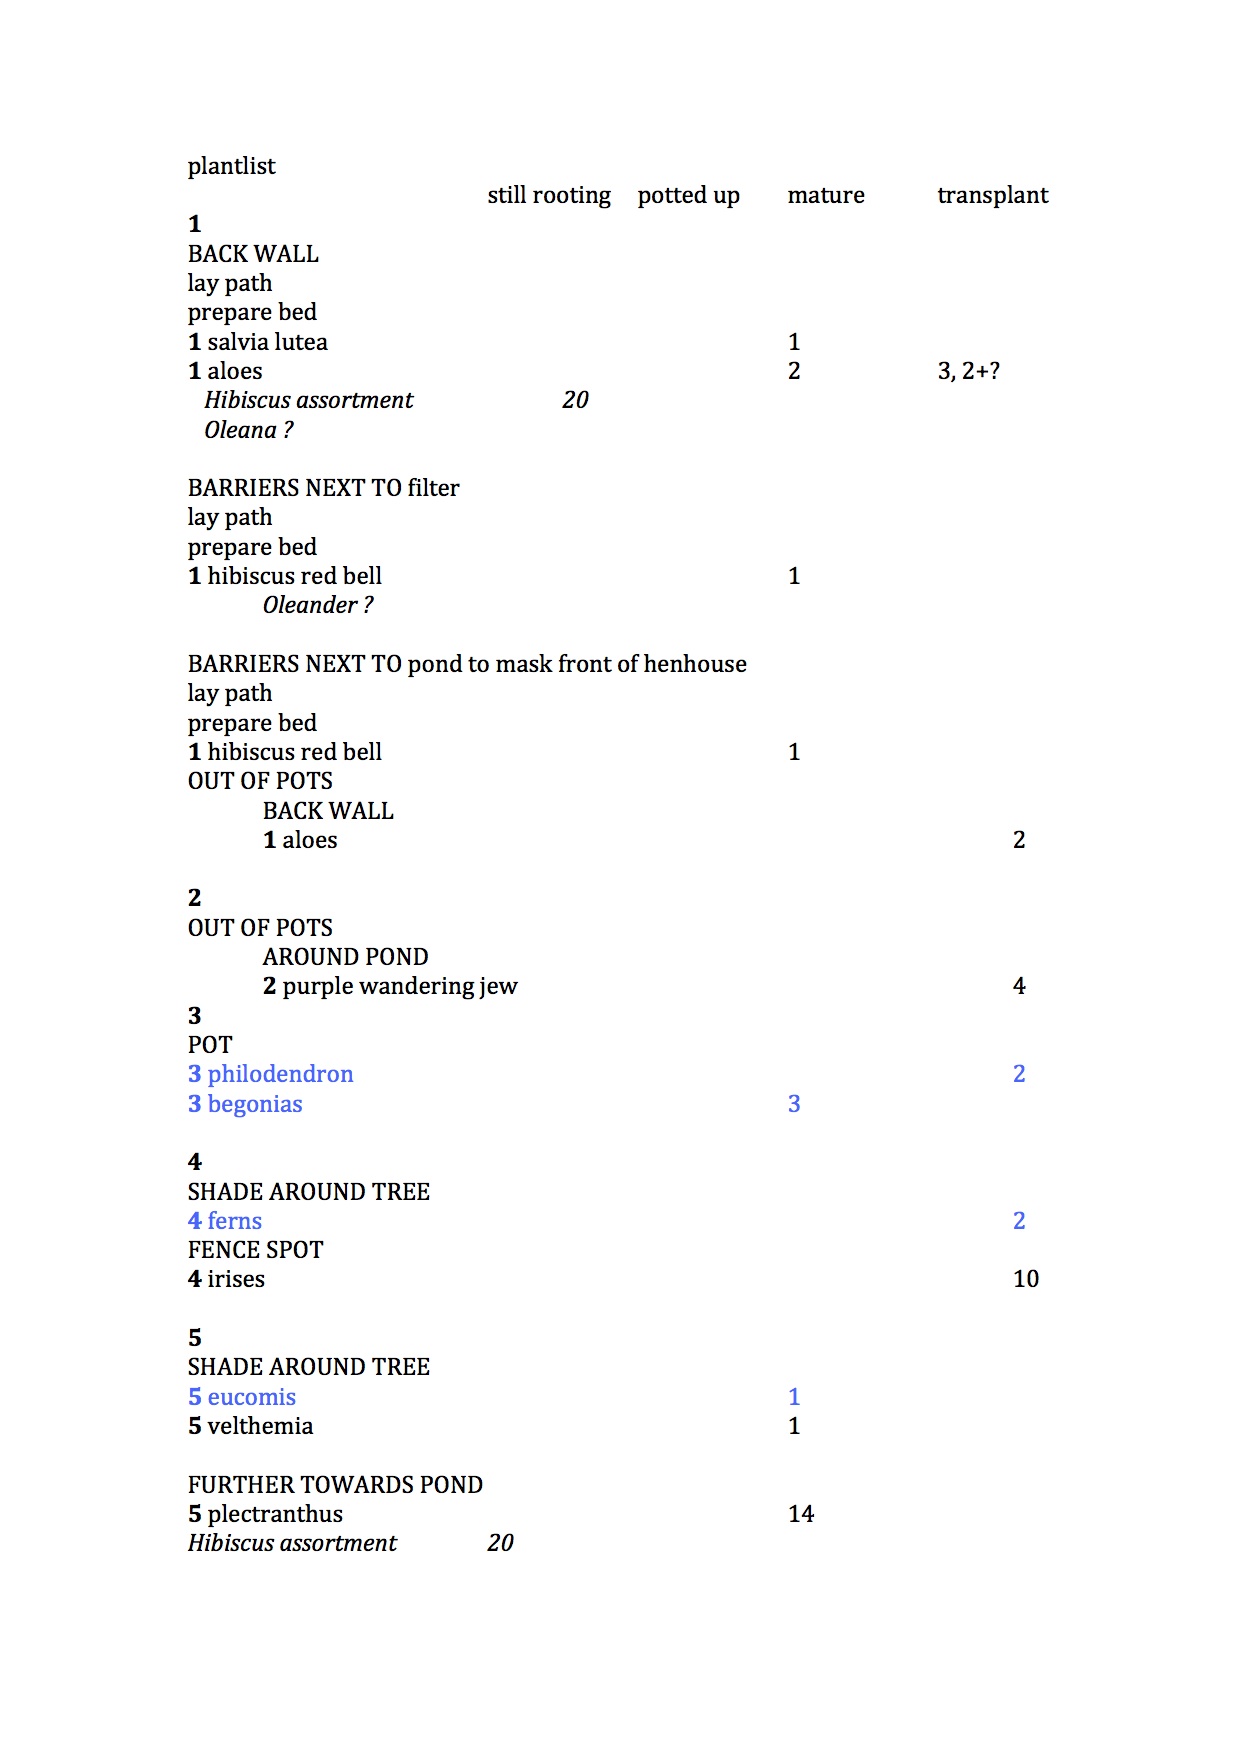
I planned the sequence of activities, certain areas requiring transplanting were a strategic problem for me, and I will do this first, after preparing paths and beds.
I ended up with a sequence of gardening subprojects in which every plant name and its locality and when it will be planted out, is itemized.
I then went back to my sketch of the garden plan to revise it, and make a more detailed garden plan. I took a clean piece and wrote in the plants from each area, in the exact places I would plant them, taking their probably appearance from eye level, and their effect on the garden sightlines into account
revised sketch of plantings
14th February 2016
I photographed all the areas I’m going to work on. The photographs don’t really give the true picture so I took a lot from all angles. I hope some of them will pair into good before and after scenarios in a while.
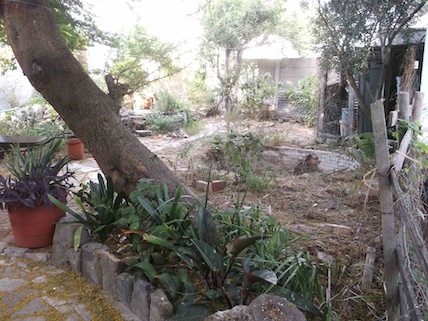
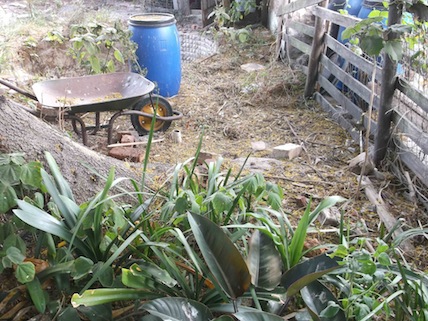
looking past the chillpit to the henhouse and garden wall
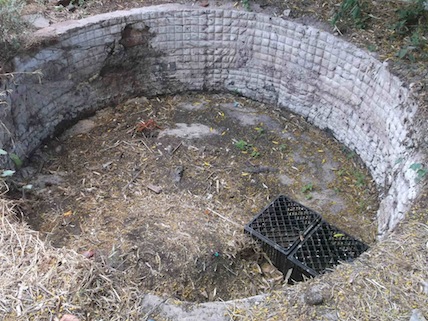
the old 1.5m deep pond is now a chillpit. it is quiet to sit in will be planted with grass
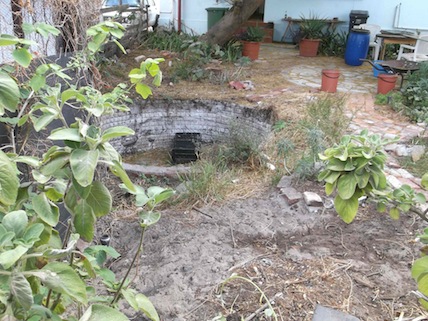
the area to be planted is on the left of the brick path all the way to the farthest red pots
the sunniest parts of the garden on the raised bed and against the wall
a sunny spot in winter next to the paling fence
I intend to make notes of the dates I start and finish all these jobs, especially the planting.
This is just for fun, but also to share with people now and to use as a memory aid, in combination with the final garden plan, should I want to see later how long plants took to grow, the effect on the design of certain kinds of plantings, and to know if plants have died and disappeared, where I planted them, to avoid future problems.
The next stage of the garden plan is the start of the physical work, clearing beds, laying paths, adding vermi-compost and watering in preparation for planting.
----------
----------
----------
stage 1 measuring up and green garden design
------
stage 3 planting the raised bed
------
stage 4 planting out the second aloe pot
------
----------
gardener's supply, Fynbos and Worm fertilizer products.
----------
typical backyard garden design
---------
some lovely pictures of Cape Town gardens, to inspire thought on what works and doesn't work
THREE WAYS TO REWARD MY WORK THAT WILL COST YOU NOTHING AT ALL. Dear Reader, in this age of AI created content, please support my human-made content. It requires a lot of research and garden experimentation, aka blood sweat and tears, the last ten years. You pay me back by signing up for the free newsletter (once a month, no spamming) at the top of the lefthand column or below. Please use the response form at the bottom of the page to respond directly to its content. If you find what I give you useful I would appreciate a share to the social media platform of your choice, the buttons are on the extreme right of your screen, Just click them !
Restore Nature Newsletter
I've been writing for four years now and I would love to hear from you
Please let me know if you have any questions, comments or stories to share on gardening, permaculture, regenerative agriculture, food forests, natural gardening, do nothing gardening, observations about pests and diseases, foraging, dealing with and using weeds constructively, composting and going offgrid.

SEARCH

Order the Kindle E-book for the SPECIAL PRICE of only
Prices valid till 30.09.2023
"How to start a profitable worm business on a shoestring budget
Order a printed copy from "Amazon" at the SPECIAL PRICE of only
or a digital version from the "Kindle" store at the SPECIAL PRICE of only
Prices valid till 30.09.2023


")