Dear Reader, in this age of AI created content, please support with your goodwill someone who works harder to provide the human-made. Sign up at the top of the lefthand column or bottom of this page. You will receive my hand illustrated monthly newsletter RESTORE NATURE and access to the biodiversity garden design course as I write...and nothing else, I respect your time. I am also removing the advertizing as best I can as its become intrusive inappropriate and pays me nothing.
My first bamboo build
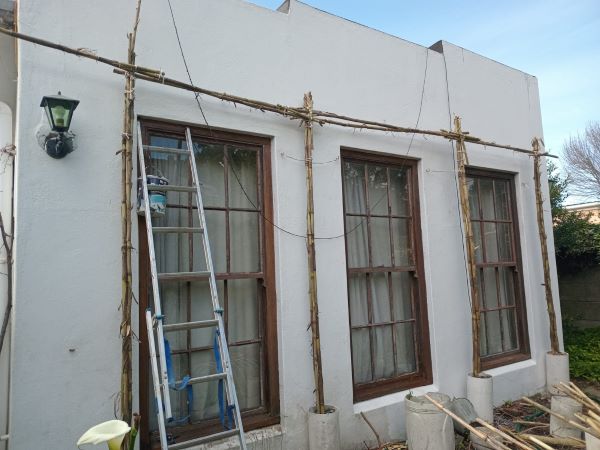
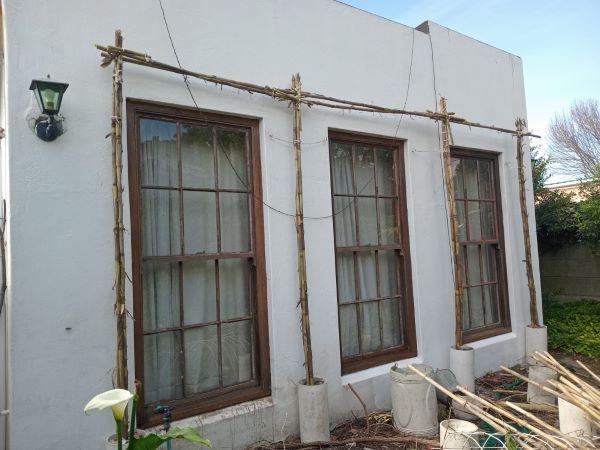
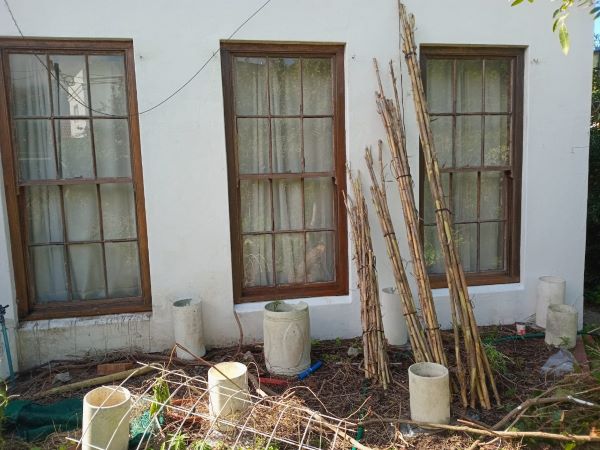 My first bamboo build waiting for assembly.
A gift from neighbourhood abundance
I'm pretty exited about using bamboo for the first time, though it is a very simple structure. I was delighted when a friend in the neighbourhood gave me a lot of cut bamboo culms as a gift. There were a few garden projects suddenly made possible for free. I could not afford the more conventional route of buying enough timber to build trellises for managing the microclimate around our house and my mother's house. It came to tens of thousands of rands, probably about two thousand dollars, and required carpentry expertise.
However as I was to learn, the culms came with a caveat ! When visiting my friend's home I saw that it was running bamboo. His backyard was overtaken by it and occupied by culms a yard or a meter apart. He explained that a client who had used his dried bamboo to build trellises in her garden was surprised to see the bamboo poles growing ! Indeed, in my own garden, one much mistreated and dessicated culm stuck in a pot of soil is now growing well. They can be very resilient, obviously. I had to find a way to stop the bamboo from growing again. I have read about ways to curb bamboo growth in various ways without massive barriers being needed, and it is very interesting but I must deal with it elsewhere, separately.
This type of bamboo doesn't have divided leaves on stalks, but leaves coming direct off the nodes. It looks a bit like sugar cane. It may be our native 'holy bamboo'. It doesn't form very strong culms ideal for building.
I also have my own bamboo plant, the clumping non spreading type, and I'm member of an international bamboo crafts brainstorming group. Here is a document on bamboo and carbon sequestration by a group member and a video on the cultural significance of bamboo in Bali.
A building project comes up
The project idea came to a head when I was able to try it out at my mother's house. We are renovating there and could not get at her lounge windows to putty and varnish as there was a vine, Rhoicissus tomentosa, a native grape, growing through wire trellises right over the windows. This vine had been grown there to protect the windows and west wall from the baking summer sun. However it had eventually made the room very gloomy, and the windows inaccessible.
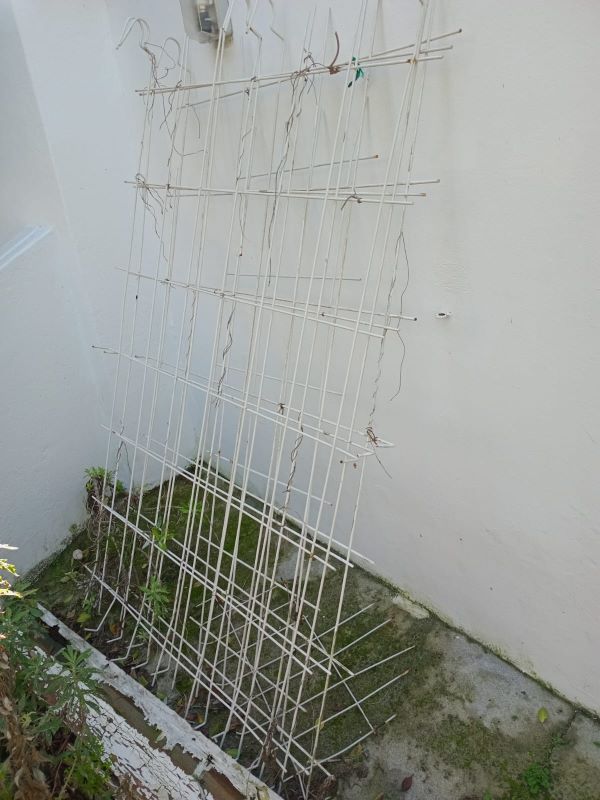 Mum's thin wire grills and wild vine were enmeshed, the windows dark and inaccessible.
A problem to solve, bamboo to the rescue
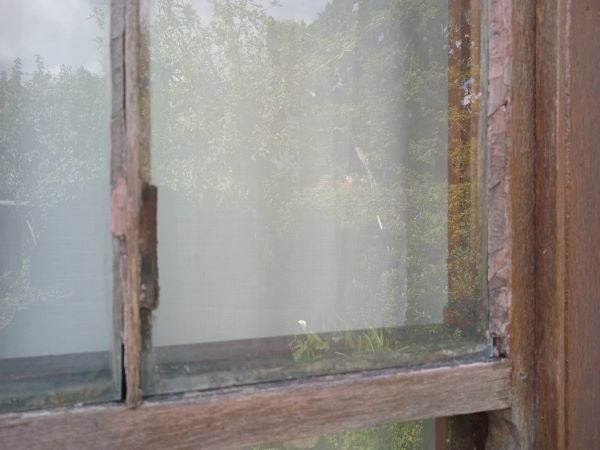 to take the windows from this to take the windows from this |
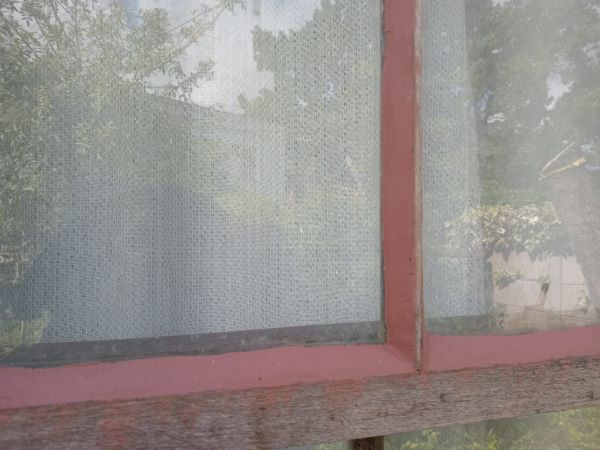 ...to this, watertight and secure ...to this, watertight and secure |
I decided to build a new trellis to allow access to the windows for maintenance and cleaning, while still supporting the vine that keeps the wall cool in summer. I thanked my lucky stars that I had so much bamboo stored at my home to use for making a strong trellis.
First I had to cut the wire grids to disentangle the grape. You can't really see the cuts, so these wire grids can be re-used as tomato cages later. I removed the grids from where they hung over the windows on wire hooks, and laid the vine on the ground. The vine was quite flexible as this species plays the role of a liana in the forest. If the vines were not flexible Tarzan would have a big problem.
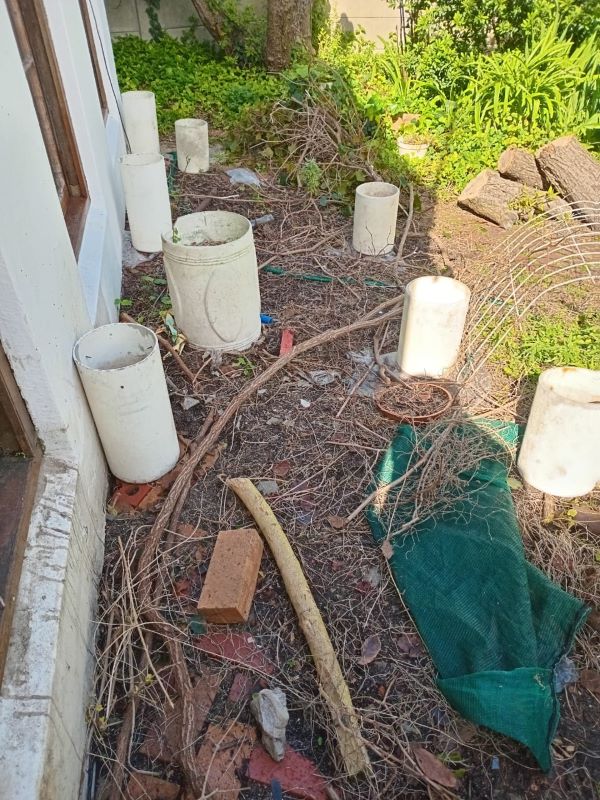 The vine is lying on the ground, the pots positioned for the trellis uprights.
How my first bamboo build was done
Instead of planting the bamboo uprights in the ground, where they could grow, I collected some cement pots, many of which were standing around the garden and placed them where I wanted uprights for a pergola. Next I had to create level stands for them as they were on sloping brickwork. I didn't want this pergola to be permanent, fastened with concrete to the bricks, as I may build a more sturdy structure later.
To make the build 'reversible' I created a barrier between the bricks and the pots. Below each pot I sprinkled loose sand and grit, then covered it with a sheet of plastic. I used a form made from a straight sided plastic bucket with the bottom cut out, and filled the form with an inch or two of concrete, mixed 3:2:1 stone, sand, cement. Then I removed the form while the concrete was still wet and placed the cement pot on the concrete it and wiggled till teh pot was vertical. This I judged by using a special short spirit level with a bubble at the tip.
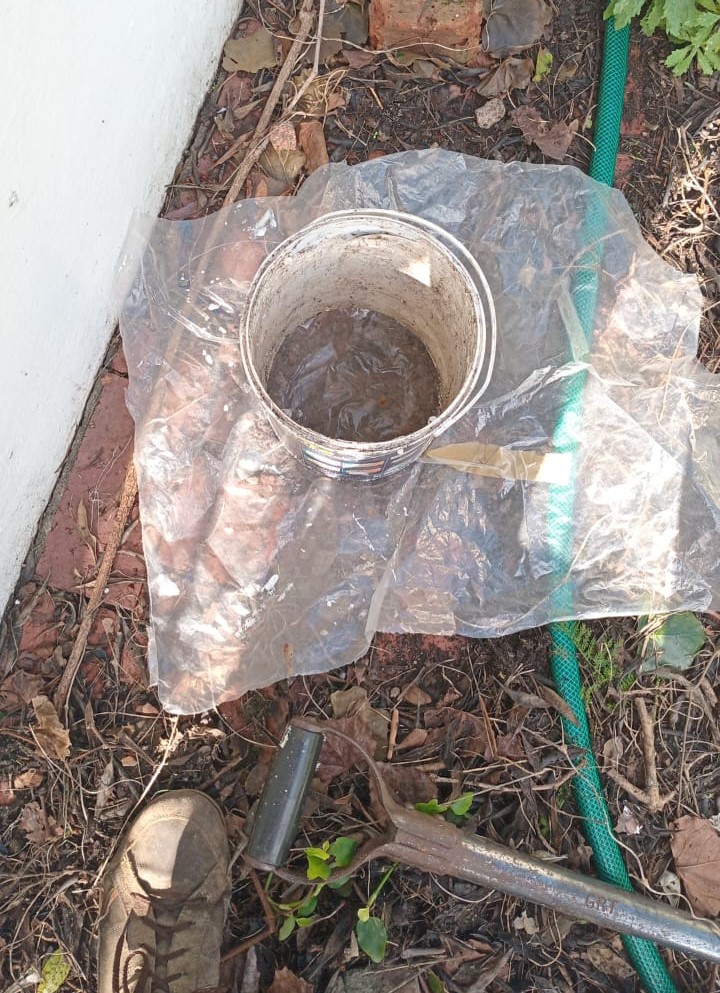 A sprinkling of grit hopefully prevents slipping, and a plastic sheet creates a barrier that makes the concrete pads removable. I'm about to pour 321 mix into this 'form' made from a bottomless bucket. It will never be as stable as conventional foundations for columns, but I don't want it to be permanent.
A few days later when the concrete was set I began to build the trellis. I placed the verticals in the pots and filled around them with rubble, of which I have many bags. I stamped the rubble down with a branch and the culms stood vertical and firm. I then attached the horizontals with string rather than wire. You can put a lot of pressure on the string and make it really tight. It is one of the traditional ways of joining bamboo during building. I thought that wire would rust or break whereas the string would hold in windy conditions. It was UV resistant string, and has not deteriorated much in the garden despite years of exposure.
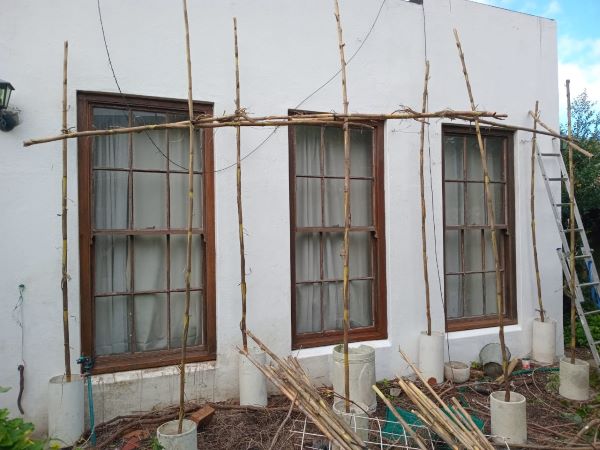 Observing my first bamboo build, I saw that the single culm structure was wonky and waving in the wind.
Assessing stage 1 of my first bamboo build
After finishing The framework of the trellis, before adding the 'roof ' poles (called beams and rafters) I stood back. I saw it was shaking in the wind, swaying to and fro. It was very flimsy, and would have to carry the heavy old vine and bean plants later. This was a bit of a problem.
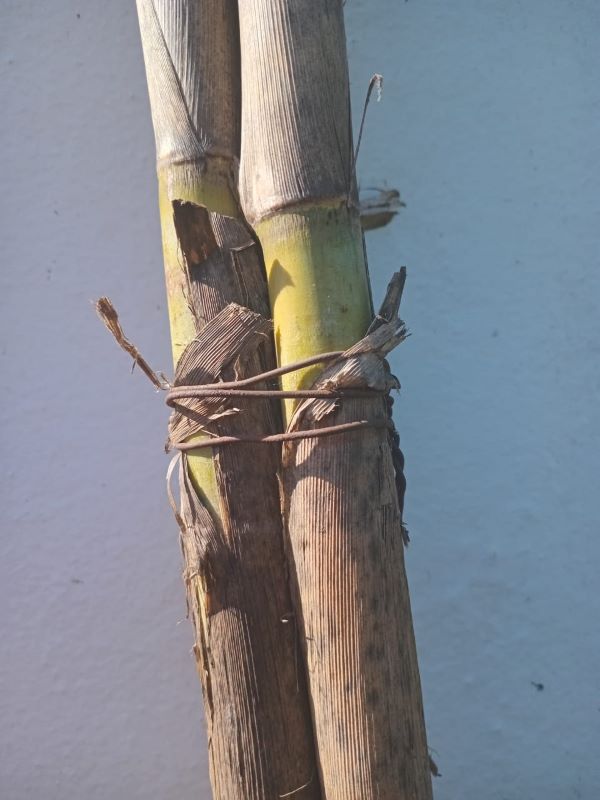 Three culms bound with wire proved very sturdy and partially corrected some of the curve in the poles.
A solution for this type of bamboo.
I thought stronger uprights were needed, so I broke down the trellis and rebuilt it. I removed the culms from the pots and tied the culms together, 3 at a time, with wire binding every 50cm. They were very easy to bind. I just held the wire with one hand and rolled the 3 culms with the other to pull it really tight. I closed the binding with a twist and folded it in between the culms to prevent it tearing clothing or skin in passing.
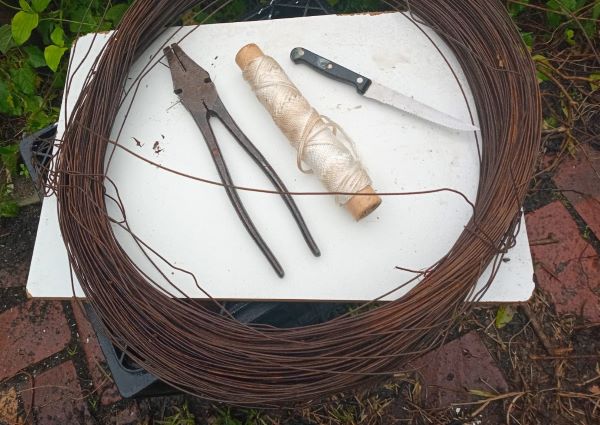 The only tools needed for binding the bamboo were old rusty wire, my trusty nylon thread, pliers, a knife and a ladder.
I emptied the rubble from the cement pots and put these reinforced verticals back in the pots and filled them up again with rubble. Unfortunately I didn't have enough long poles, so I need to bring four more from my other home to complete the job.
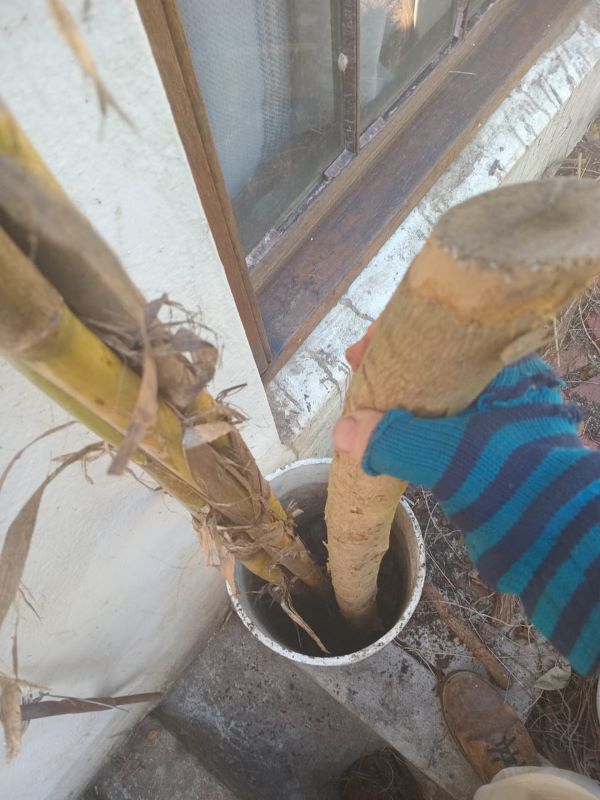 I stamped down the rubble around the poles to hold the uprights in position more firmly.
I tied the verticals to the hooks in the wall which were there already, for extra strength against the wind. A few days later I took the extra canes needed to the site in our bubble car, and finished binding the verticals, setting them in the pots, adding the rubble and tying them onto the wall hooks. Now that the verticals are in place, the horizontals can be tied on, and later I can tie the vine to the frame.
The forward extension into the garden which will create a small shaded area outside the windows can be built later when the house is finished.
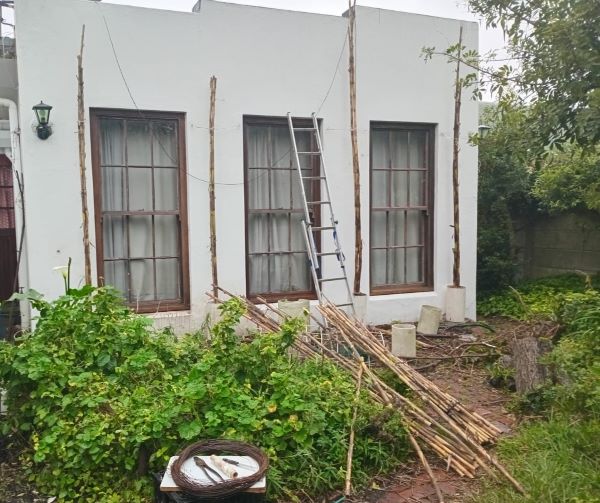 All the reinforced verticals for my first bamboo build are in place.
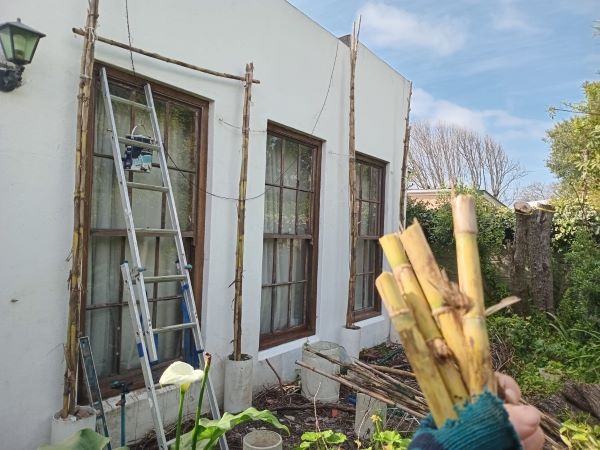
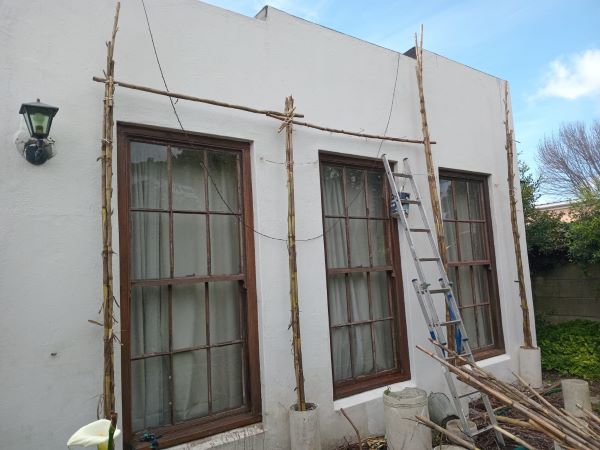
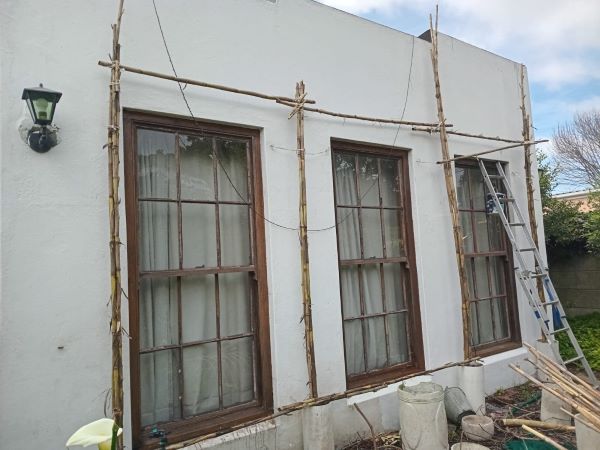
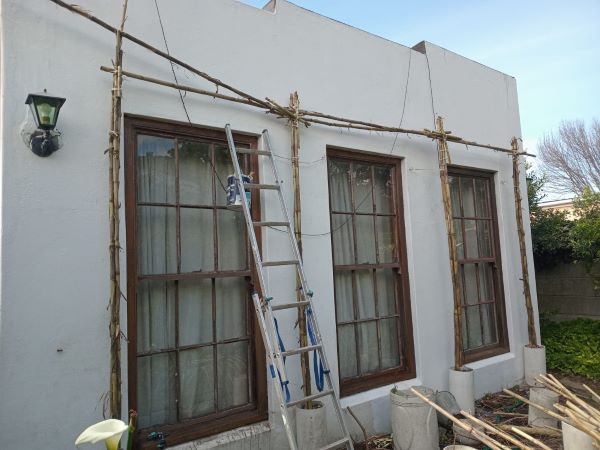
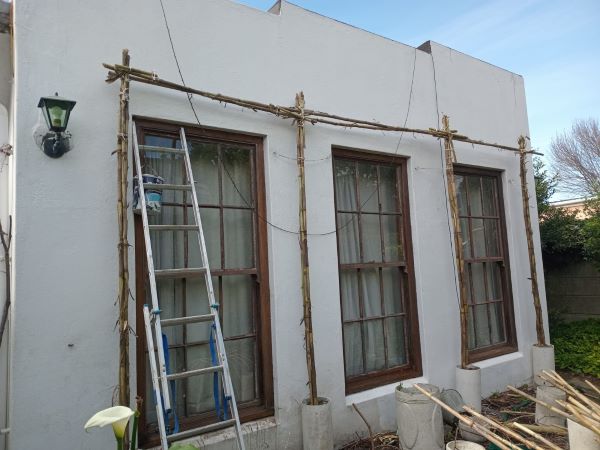
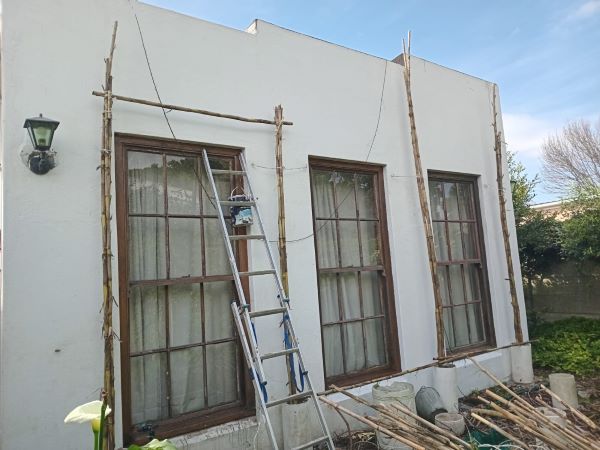
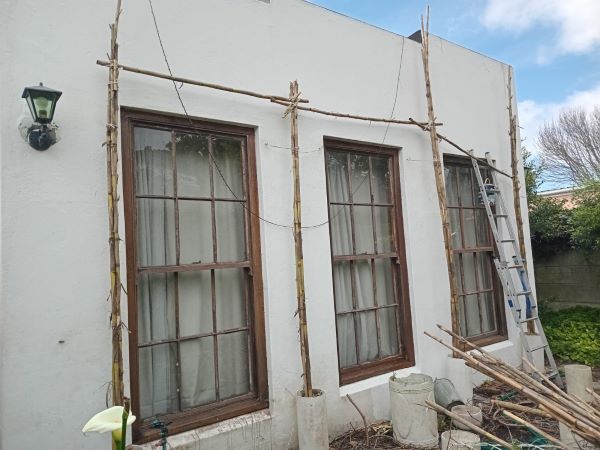
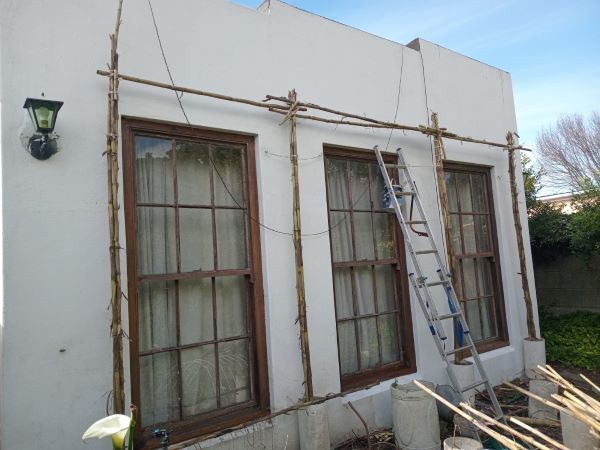
A day later I attached a double row of horizontal culms and trimmed the excess off the verticals. I used a type of bamboo join called a tourniquet join, which is done with rope, and it is very tight. However I learned that I've much to learn. The tourniquets unwound a little if there was any leeway and stood at all different angles looking a bit messy. Now I understand the necessity for clove hitches, as they allow a tighter knot in the beginning. My double knots which were probably mostly what my dad would call 'grannies' slipped a lot and the rope wasn't good at gripping. Perhaps that is why the youtuber uses paracord rather than silky nylon. She explains the knots much better than I could with video, so have a look here.
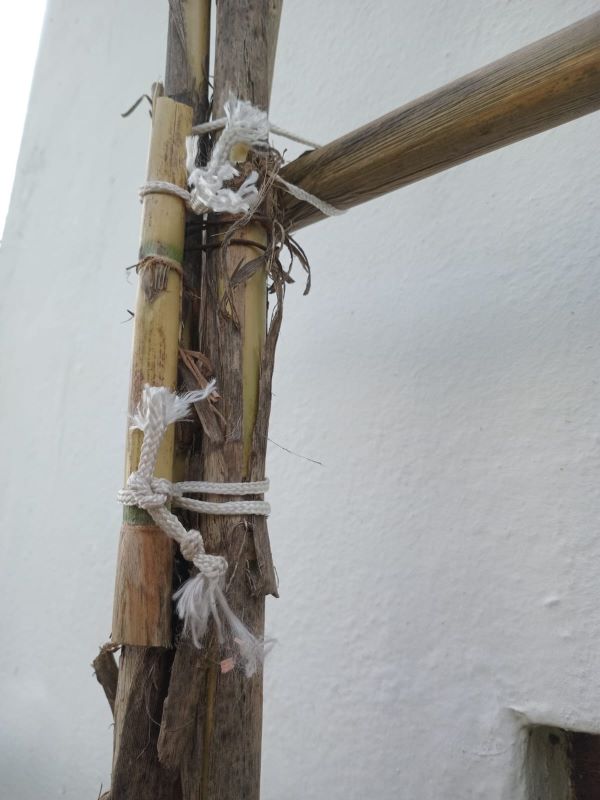 My neatest tourniquet join. Its easy to see that this string is problematic and unraveling.
I've put together a series of pictures of the work on the horizontals. I hoped you'd be able to navigate through them just be clicking an arrow, but we don't have a slide show function, sorry, it would have been 'sexier'. Be that as it may, it was a white knuckle job for me as I've a neurological disorder that makes me incredibly dizzy when I look upward. But its done. This is what love can accomplish.
     |
     |
My first bamboo build is done... what's next ?
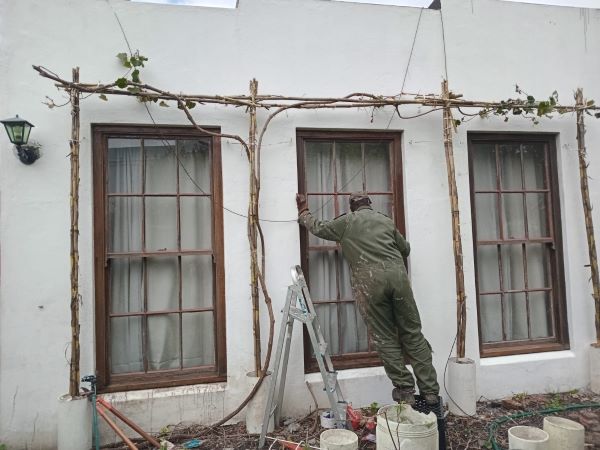 The vine has been heavily pruned and tied to the bamboo trellis and George can finally access the windows.
home page for links to articles on many aspects of natural gardening
Biodiversity gardening blog "Garden for Life"
Restore Nature Newsletter
I've been writing for four years now and I would love to hear from you
Please let me know if you have any questions, comments or stories to share on gardening, permaculture, regenerative agriculture, food forests, natural gardening, do nothing gardening, observations about pests and diseases, foraging, dealing with and using weeds constructively, composting and going offgrid.
Your second block of text...
SEARCH
Order the Kindle E-book for the SPECIAL PRICE of only
Prices valid till 30.09.2023
Recent Articles
-
garden for life is a blog about saving the earth one garden at a time
Apr 18, 25 01:18 PM
The garden for life blog has short articles on gardening for biodiversity with native plants and regenerating soil for climate amelioration and nutritious food -
Cape Flats Sand Fynbos, Cape Town's most endangered native vegetation!
Apr 18, 25 10:36 AM
Cape Flats Sand Fynbos, a vegetation type found in the super diverse Cape Fynbos region is threatened by Cape Town's urban development and invasive alien plants -
Geography Research Task
Jan 31, 25 11:37 PM
To whom it may concern My name is Tanyaradzwa Madziwa and I am a matric student at Springfield Convent School. As part of our geography syllabus for this
"How to start a profitable worm business on a shoestring budget
Order a printed copy from "Amazon" at the SPECIAL PRICE of only
or a digital version from the "Kindle" store at the SPECIAL PRICE of only
Prices valid till 30.09.2023


