| Back to Back Issues Page |
 |
|
Restore Nature, Issue #012 May 14, 2024 |
HelloRESTORE NATURENewsletter 12May 2024This is the story of how I found a solution to a thorny problem. It is obvious enough as a solution, yet I took years to find it, and I'd like to share it with you incase it is useful to you. 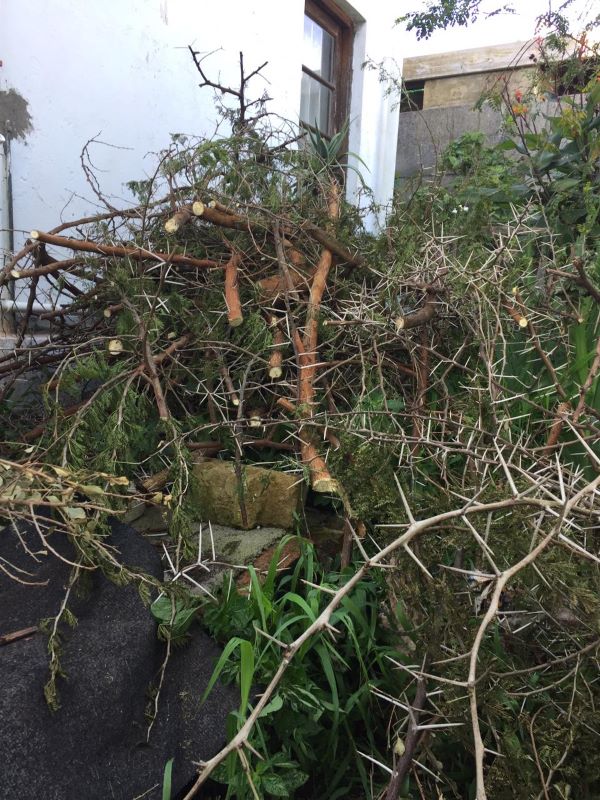
The prickly issueMy garden produces an excess of tree, bush and vine trimmings, so massive that the tree trimmings began to drown certain areas of the garden. Thorn branches were a special problem because the thorns take forever to decompose. Handling the branches leaves my hands punctured and burning for days, even with gloves, and leaving the branches lying around makes huge areas of the garden into no go zones and danger to animals, making me unpopular with my family.You may ask why I don't just take the branches to the dump or burn them. I learned during my permaculture design PDC course that taking your trimmings offsite depletes your land's nutrients. It is like donating all the goodness in your soil and plants to a landfill. Imagine all the minerals stored in the massive tonnage of a large tree. With our nutrient poor soils it seems crazy. I just had to solve the problem and as said, my family were not welcoming. After all they did not attend the PDC course so keeping garden waste onsite made no sense to them. They argued that we put enough back with our kitchen waste and humanure, which sounded suspiciously like 'we already do enough inconvenient things for you'. However, I think if you see the cubic meters of tree trimmings our garden can produce, and compare it to the mass produced in vermicast or humanure, about 200 liters a year, the composting does not return enough. There is no balance, rather an accumulating deficit. 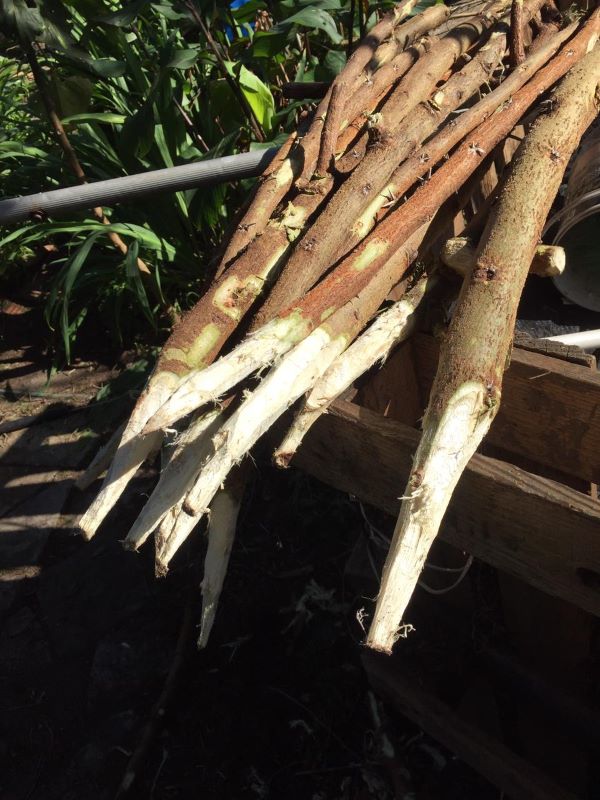
Are more spikes the answer ? What can these be for ? The unsatisfactory first solutionsMy first solution was to buy a small shredder. Unfortunately the blade remained sharp for about three sessions, but the worst of it was that the thorn branches with the thorns projecting outward in all directions blocked the mouth of the shredder. I am sure you can make ropes with thorn branches because the long, tough fibers wound round the blade and ground the machine to a halt. I began to chop up garden waste with a machete again, and I still do this, but it doesn't work for branches thicker than a pencil. I asked the arborist who did my mother's trees to chip the small and medium branches and leave the chip in the drive. It was such a massive pile I needed to fill 100 large bags to remove it. I don't have that many so it had to be done bit by bit. It took months to clear. Though I grew to love using woodchip it needs storage space when dropped off in quantity of course.
An answer with traditionThat was when I came upon the idea of using branches to build a hedge. I found out that they are well known around the world and called dead hedges in England. I very soon built one at my mother's house, working with her gardener who is an old man of about my age. I was delighted to find he was very familiar with building like this with branches, and could teach me a thing or two. This age old rural northern European building technology is identical to a traditional Xhosa way of building a cattle inclosure to keep the cattle in and the predators out. The Khoekhoe people of southern Africa were also known to build a traditional inclosure of piled branches for sheltering cooking fires in this windy area of the world. It is called a 'skerm'.This family of technologies may be universal and is undoubtedly very ancient. It is closely related to building woven fencing, or wattles for wattle and daub structures used here and in Europe. 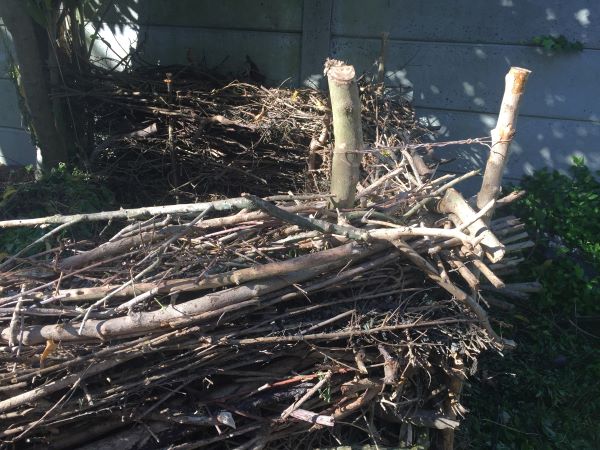
Tied off stakes at the top prevent the wall from opening and collapsing downwards. How to build with branchesIf you want to build a wall you take pairs of branches, sharpen the ends and hammer them into the ground as far apart as the thickness of the wall you desire. You then lay other branches between these two posts. You will need to put in the double posts every few meters or so, depending on how long your branches are. I've found that shorter branches can be laid ontop of the wall, as long as you incorporate them, hook or weave them in somehow so that they catch and don't fall. Alternatively thick branches can be laid over thin ones to pin them down. When the wall is as high as you want, tie the post pairs together to prevent the wall opening out and then you can saw off the posts above the tie if you desire.For a really sturdy dense hedge you can tread on the wall. We use thick soled army boots to do so, which are necessary especially when you are compressing piles of thorn branches.
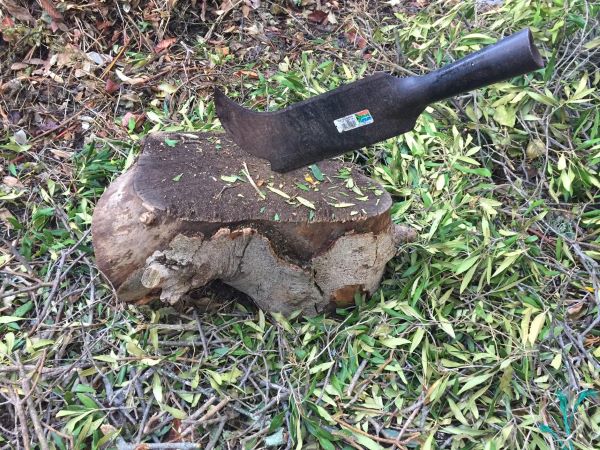
You can use a chopper or machete to sharpen the stakes. Different shapesYou can build a linear dead hedge to be used as a dividing fence, or you can use it to inclose, as in the case of the cattle kraal and the skerm.When building an inclosure it can be round, rectangular or any shape you wish. If it has corners, place three posts at each corner in an L shape facing in or out of the corner, and lay the sticks first through one gap and then through the other at right angles so that the corners are nicely bonded together. A simple adaption extends usesThe cattle inclosures probably have very wide and high fences. I wanted to build something thinner and lower to hold soil and compost. If they are lined with plastic or landscape fabric they can contain soil and become a wicking bed or a free draining raised bed respectively. I guess one could even plaster them with clay and lime.
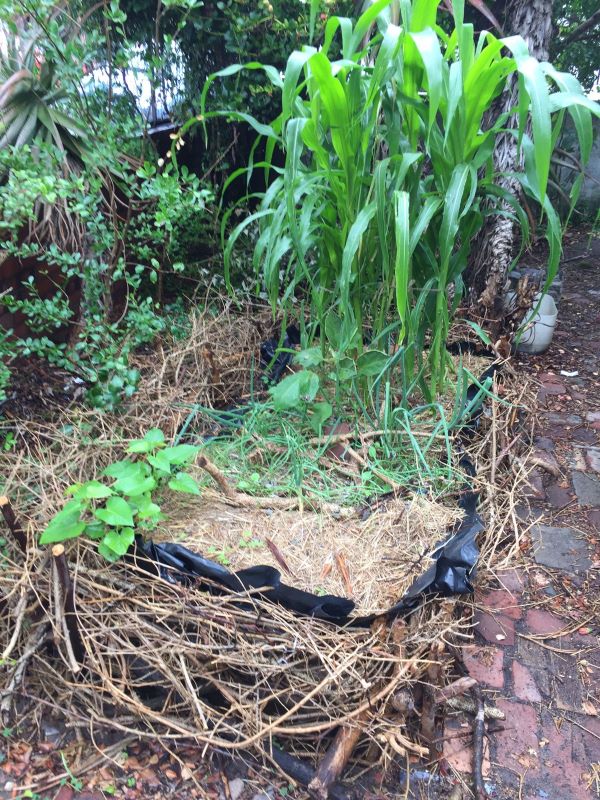
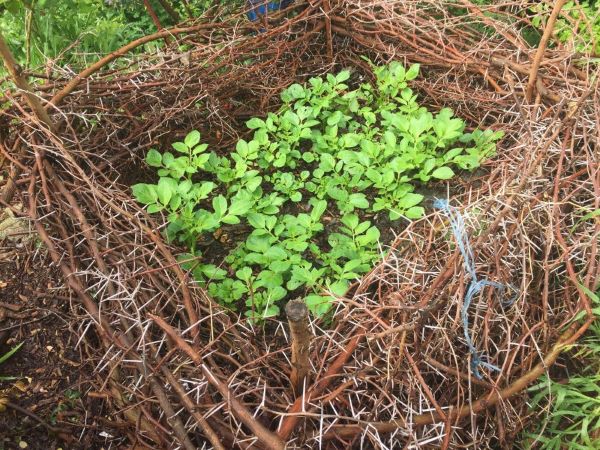
My first dead-hedge raised bed. The plants are thriving. Building a buried hugelbeetAfter building the dead hedge surround, we dug a trough in the middle, into the ground, and chose to dig it as deep as the wall height. The trough and the hedge can be lined on the inside with used carpet underfelt from carpet installers. In our case I found some lovely old brown coconut coir underfelt when I ripped up my mom's old carpets. It's a natural brown that blends in perfectly with the wooden surround. On top of the underfelt I lined the bed with a black plastic drop sheet.In our first lined dead-hedge bed, we filled the bottom half loosely with wood such as logs, branches and twigs, made small holes every 20 cm or so in the plastic with a screwdriver about half way up, and then backfilled with sand, well watered in, and topped off with a sprinkling of pigeon manure and then a few inches of compost. If your climate is very wet you may want to line the bed only with fabric, but I line mine with plastic, not because I love its volatile petrochemical compounds but because it retains water, to such a degree that plastic lined beds have changed my vegetable growing life. I planted maize, eggplant, onions and sweet potato cuttings into the dead hedge bed and they are thriving with 7 Liters of water every second day, when in our climate its usually impossible to keep these plants healthy without a lot more irrigation. Only the eggplant is a bit dog eared, but I think its the wind in the front garden, not lack of water. 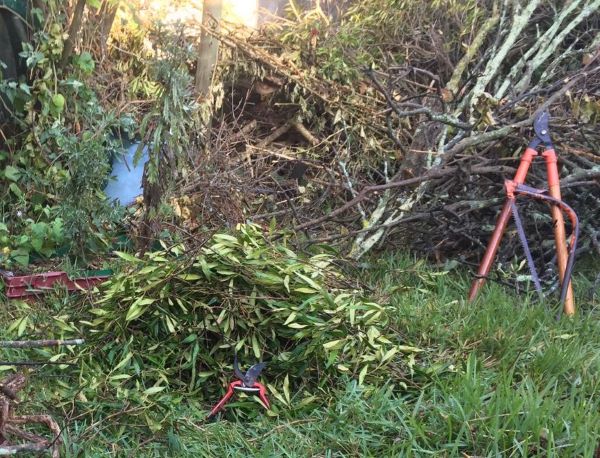
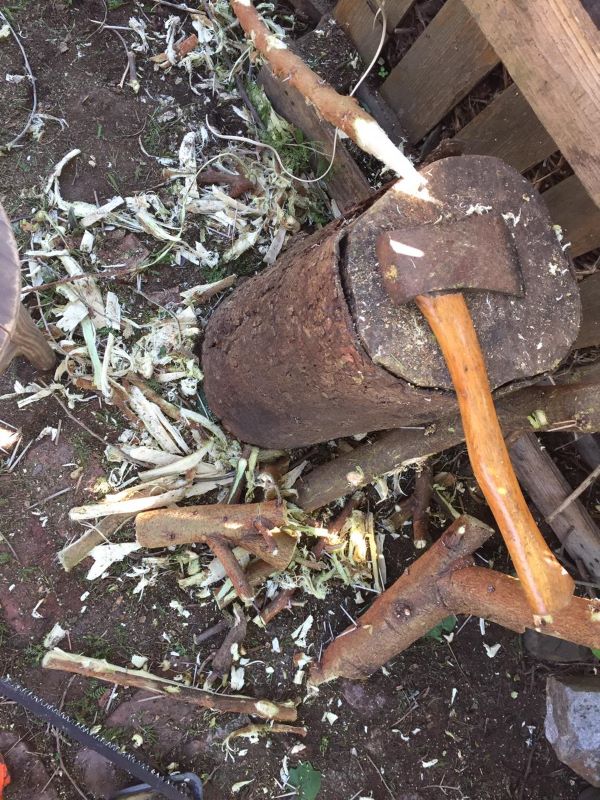
All the tools I need to efficiently reduce branches Processing tree branches efficientlyI recently had a very large tree topped in my mother's garden. The arborist left us with a pile of logs and a pile of smaller side branches.I have developed a method of reducing brush which works for me. Rather than working from large to small tools which seems logical, I find that the other way, from small to large tools works more efficiently. It depends of course on the tree. It works brilliantly on the rather sparce growth of the wild olive. Starting with small hand clippers I move very fast removing all small branches with leaves. I go for the thickest diameter that the clippers can cope with instead of fussing with all the smaller branches. I soon have a pile of leafy sticks. These are taken to the composting area. There I have my chopping block and holding a bunch of twigs by the thickest end, I rapidly chop up the 'posy' of leaves with the machete, and then let go of the stalks and chop them up. With next to no set up time, no jamming and blocking or cleaning and no replacement parts needed, I've found the machete (actually a cane knife) to be more efficient than a shredder at getting twigs compost ready. By contrast the machete needs an occasional sharpening. In addition there is the cost of a shredder and the power or fuel it uses. The machete is hands on...or rather hands out of the way... I never lose the fear and respect for this tool. Then I start again on the branches. They are mostly ready for building, as any branches which poke out of the wall can be trimmed after building. With a lopper I trim any really problematic smaller branches, and these smaller trimmings can be used as kindling and firewood. Then I get the saw and remove any wood that is too bulky for the dead hedge and add it to the pile of logs. By this time its just a couple of cuts and a massive pile is done. Of course the arborit's chainsaw helped get the wood ready for this process. He reduced the tree to 2 to 3 meter lengths: a pile of long logs and an enormous pile of long thinner branches. If you are taking down a tree yourself its requires another level of engagement and time.
Getting twigs compost ready. Neatness and harmonyWe are now onto out fourth dead hedge inclosure, and with time we build better and better with neater and more attractive results. I've found that branches that are trimmed clean of leaves and twigs, and made of the same wood, build the neatest hedge. There is enough variety of form and colour in a dead hedge as it is, so if one contains the chaos somewhat the sticks harmonize. But this is just my opinion and taste.The pleated ends of the plastic sheets don't look nice so I suggest that should you need to use plastic, after filling the bed you fold the plastic outwards over the wall, trim the plastic so that its edge can be buried inside the wall and lay a few more inches of sticks over it to cover up the ends. You can see in the picture what it looks like if you don't do this. Lesson learned ! You could also cover the plastic with underfelt before filling it up if the underfelt is attractive. 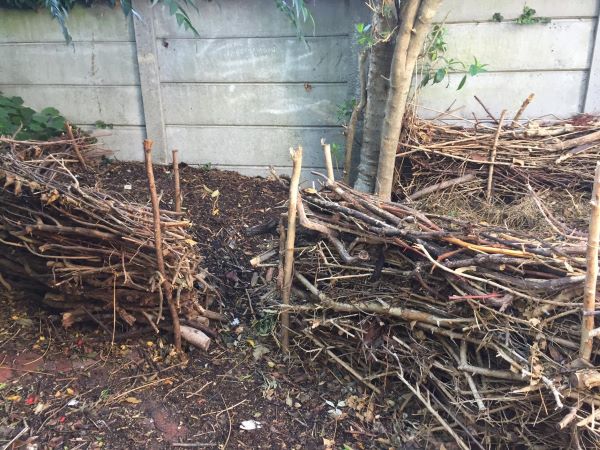
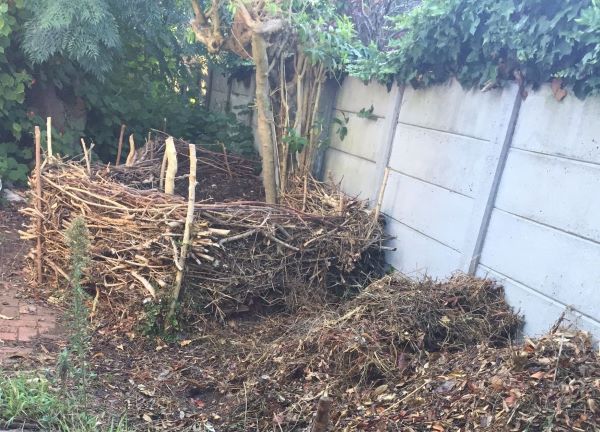
Our double composter, useful for digging over from right to left as compost matures. The left hand side is built later. Some benefits and disadvantagesLarge areas of the garden filled with unprocessed branches inconvenience one. In a small garden they need to be processed quickly or one can't move about. Its a lot of work, but so is hiring a trailer and loading them and taking them to the dump, if one cuts the tree oneself. Getting the arborist to take away the branches would cost the money for a day's labour anyway.Depending on the climate and location and how long one takes to process, piles of sticks can create a fire hazard. Keep them away from the house. The advantage is that a dead hedge wall filled with a buried hugelbeet of logs and smaller branches will consume so many trimmings that vast branch piles meters high and wide will just melt into it. Building a low knee high 3 by 1 meter enclosure swallowed up a 3 meter cubed brush pile, and all this with ten hour's work. When you bury and composts tree waste, you do not have to cut the logs up as you would when making firewood. Quite long pieces can be buried in the bed, meaning less work with the chainsaw. Piles of dead wood provide nesting place and shelter for beneficial insects, small mammals and hosts of other small creatures in your garden. They can decompose slowly and add lovely black fungal rich humus to the soil, as well as protecting it from rain, erosion, depletion and scorching sunlight. The hedges serve as windscreens, compost bins, animal inclosures, fences, screens for utility areas and the walls of grow beds. Dead hedges drain wellWe recently built a second chamber for our compost and dug over our massive meter high and two meter wide heap into the second chamber... or that was the plan. It was scarcely composted and very dry, despite frequent watering. It had to be chopped up and recomposted. I think the dead hedge walls drain too well. In our desert climate this is a flaw but in other areas of the world it will lead to a lovely well oxygenated compost heap. I should have lined the walls with plastic. I find this always conserves enough moisture to produce nice sweet smelling black earth in a few months...whereas in other wetter climates you would be in danger of producing a stinky anaerobic mass.
a thoroughly protected in ground potato bed Final dig on fertilityA caveat on fertility: Contrary to promises made in some regenerative agricultural circles, adding carbon doesn't produce fertlity alone. I have to conclude that in our climate adding water is also very important. Water is the primary nutrient. For us this is a problem, for others it scarcely deserves mention.In some places adding carbon may be enough to produce healthy vegetables. However, I have applied the principle of not removing organic material from my garden for several years now and without water organic material just oxidizes, as described for brittle zones in permaculture. Here more inputs are needed to grow the usual exotic vegetables, compared to our tough native plants. As far as nutrients are concerned, adding carbon to our super low nutrient soil will not provide enough. I am obliged to add kelp, ash and animal waste to areas for growing annual non native vegetables. I also have to use plastic and thick layers of dead or living mulch to conserve water. How and to what degree carbon retention, nutrients and water each contribute to greater soil fertility in the garden is complex issue to be dug into on another day, Topic suggestions welcomeYou may write to me anytime at the website greenidiom by filling out a comment. You can also use my webmail (website mail) address greenidi@greenidiom.com. Part 2 of 'Gardening against Extinction'Part 2 of 'Gardening against Extinction' deals with the basics of designing a garden for maximum biodiversity. This section is not yet ready but getting a lot closer. The modules come if and when they're completed as I'm learning, researching and writing as we work through the course. I hope you enjoy the course !
Have you missed the introduction ?Please go to back issues right below if you want to catch up with what I've sent thus far as preamble for the course, as well as previous newsletters. |
| Back to Back Issues Page |